Ingredients
Equipment
Method
STEP 1 & 2: Preparing the Chia Base
- In a medium-sized jar, mixing bowl, or sealed container, combine the coconut milk, 2 tablespoons of maple syrup, vanilla extract, and sea salt. Stir these wet ingredients together thoroughly until the sweetener is completely dissolved.
- Add the chia seeds to the liquid mixture. Stir vigorously for about one to two minutes, ensuring that all the seeds are wet and evenly distributed throughout the liquid. This initial step prevents the seeds from clumping at the bottom.
- Allow the chia seed mixture to sit on the countertop for 5 to 10 minutes. This period allows the seeds to begin absorbing the liquid.
- After the brief rest period, stir the pudding once more very well. This second stir is critical for achieving a consistently smooth pudding texture, as it breaks up any small lumps that may have formed while the mixture rested.
STEP 3: Chilling
- Cover the container tightly with a lid or plastic wrap. Place the pudding mixture into the refrigerator. Allow the pudding to chill and fully set for a minimum of 4 hours, though overnight chilling is highly recommended for the best, thickest, and most gelatinous results.
STEP 4-6: Topping and Assembly
- Prepare the Lemon Cream Topping: In a separate small bowl, combine the Greek yogurt, fresh lemon juice, lemon zest, and 1 tablespoon of maple syrup.
- Whisk the topping ingredients together thoroughly until the mixture is completely smooth and the lemon zest is well integrated. Taste the cream and adjust the sweetness or lemon juice based on your desired level of tartness.
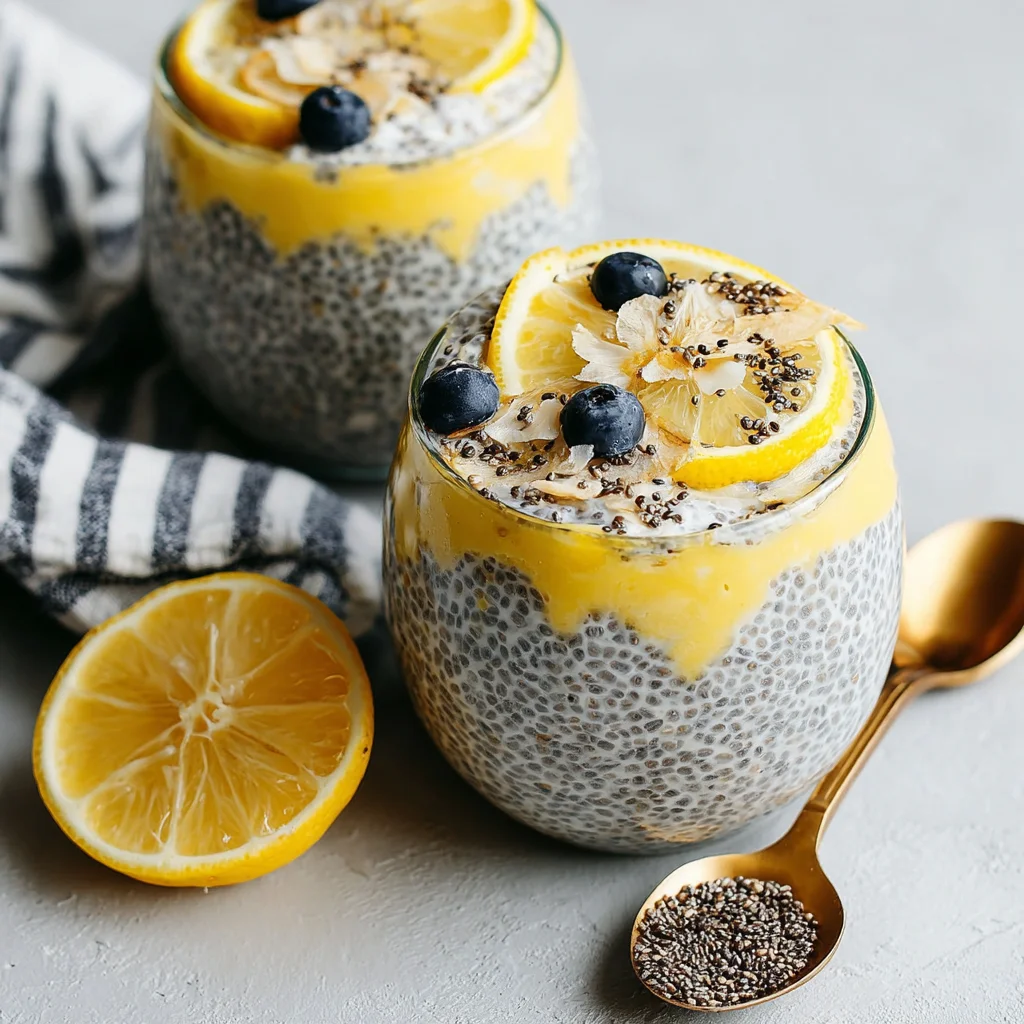
- Assemble the Pudding: Once the chia pudding is fully set, retrieve it from the refrigerator. Give the pudding a quick stir to loosen the texture slightly before serving. Divide the prepared chia pudding evenly into two serving glasses or small bowls.
- Spoon the prepared Lemon Cream Topping generously over the top of the chia pudding layers in each glass. Garnish immediately with optional toppings such as fresh berries, a sprinkle of granola for crunch, or a tiny curl of fresh lemon zest.
Notes
Meal Prep Tip: The chia pudding base can be prepared and stored in the refrigerator for up to 5 days. For the best taste and texture, prepare the fresh lemon cream topping just before serving. If using full-fat coconut cream for a dairy-free topping, ensure the can has been chilled overnight so the thick cream separates from the liquid water.