Ingredients
Equipment
Method
Step 1: Prepare the Crust
- Preheat oven to 350°F (175°C).
- In a medium mixing bowl, combine the cookie crumbs and the 1/4 cup of granulated sugar.
- Pour the melted butter over the crumb mixture and stir until everything is evenly moistened and resembles wet sand.
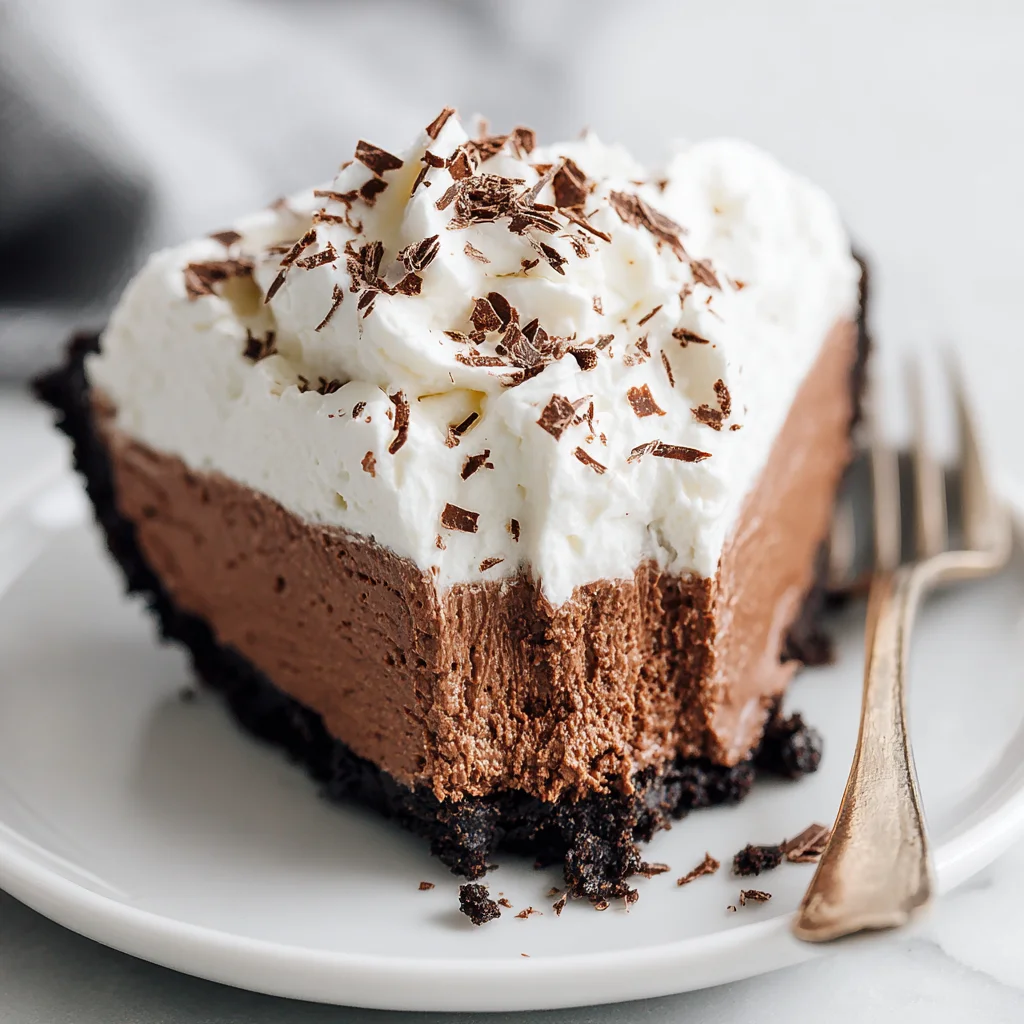
- Press the mixture firmly and evenly into the bottom and up the sides of a 9-inch deep-dish pie plate. Use the bottom of a measuring cup to help compact the crust.
- Bake the crust for 8 to 10 minutes until set. Remove from the oven and allow the crust to cool completely on a wire rack before filling.
Step 2: Prepare the Chocolate Silk Filling
- In the bowl of a stand mixer fitted with the paddle attachment, cream the softened 1 cup of butter on medium speed until smooth, about 1 minute.
- Gradually add the 1 1/2 cups of sifted powdered sugar to the butter and beat on medium-high speed until the mixture is light, fluffy, and very pale in color, scraping down the sides of the bowl often. This process should take approximately 4 to 5 minutes.
- Add the melted and cooled chocolate and the vanilla extract to the creamed mixture. Beat on low speed until just combined, then increase to medium speed and beat for 1 minute.
- Ensure the mixture is fully incorporated, then stop the mixer and scrape down the sides.
- Add the eggs one at a time, beating well after each addition.
- Once all four eggs have been added, increase the mixer speed to high and beat the filling vigorously for a full 5 minutes. This long beating time is crucial for achieving the light, airy, and 'silky' texture. The mixture will lighten in color and volume significantly.
Step 3: Assemble and Chill the Pie
- Carefully spoon the prepared chocolate silk filling into the cooled pie crust.
- Use a rubber spatula or the back of a spoon to smooth the top of the filling.
- Cover the pie loosely with plastic wrap or foil (be careful not to touch the filling).
- Refrigerate the pie for a minimum of 6 hours, or preferably overnight, until the filling is firm and fully set.
Step 4: Prepare the Whipped Topping and Serve
- Just before serving, place the cold heavy whipping cream, 1/4 cup powdered sugar, and 1/2 teaspoon vanilla extract in the bowl of a stand mixer fitted with the whisk attachment.
- Beat on medium-high speed until stiff peaks form. Be careful not to over-beat, which can turn the cream into butter.
- Spread or pipe the freshly whipped cream over the chilled chocolate silk pie.
- Garnish with chocolate shavings, if desired.
- Slice and serve immediately. Store leftovers in the refrigerator.
Notes
Safety Note: Because this filling relies on raw eggs, you must use pasteurized eggs (often labeled 'safe for consumption raw') or use an alternative method like a chocolate mousse base if you cannot source pasteurized eggs.
Tip: The 5-minute whipping time in Step 2 is non-negotiable! This long beating incorporates air and emulsifies the butter and eggs, creating the signature light, fluffy 'silk' texture.