Indulge in the irresistible allure of a No Bake Peanut Butter Pie, a dessert that’s as easy to make as it is delightful to eat. This classic no-bake pie recipe requires no oven time, making it perfect for warm weather or those days when you simply don’t want to heat up your kitchen. The creamy peanut butter filling, nestled in a buttery graham cracker crust, offers a symphony of flavors and textures that will leave you craving more. Forget complicated baking techniques and lengthy preparation times; this recipe is a testament to the fact that simple ingredients can create extraordinary results. Whether you’re a seasoned baker or a novice in the kitchen, this No Bake Peanut Butter Pie is a guaranteed crowd-pleaser, ideal for potlucks, summer gatherings, or a simple weeknight treat. Get ready to experience a dessert that’s rich, satisfying, and effortlessly delicious!
Why You’ll Love This No Bake Peanut Butter Pie Recipe
This No Bake Peanut Butter Pie recipe isn’t just another dessert; it’s an experience. There’s something truly magical about the combination of creamy peanut butter and a crunchy graham cracker crust. But beyond the deliciousness, there are several reasons why this recipe stands out:
- Effortless Preparation: Say goodbye to oven-preheating and baking times! This No Bake Peanut Butter Pie requires minimal effort, making it perfect for busy weeknights or spontaneous dessert cravings. The entire process, from crust to filling, can be completed in under 30 minutes, leaving you with ample time to relax and enjoy the fruits of your labor.
- No Special Equipment Required: You won’t need any fancy kitchen gadgets or specialized tools. A simple mixing bowl, a whisk, an electric mixer (or strong arm!), and a pie plate are all you need to create this masterpiece. Its simplicity is one of its greatest strengths.
- Customizable Flavors: While the classic recipe is already amazing, this No Bake Peanut Butter Pie lends itself beautifully to customization. Feel free to experiment with different types of peanut butter, add chocolate chips, or incorporate other mix-ins to personalize your pie. The possibilities are endless.
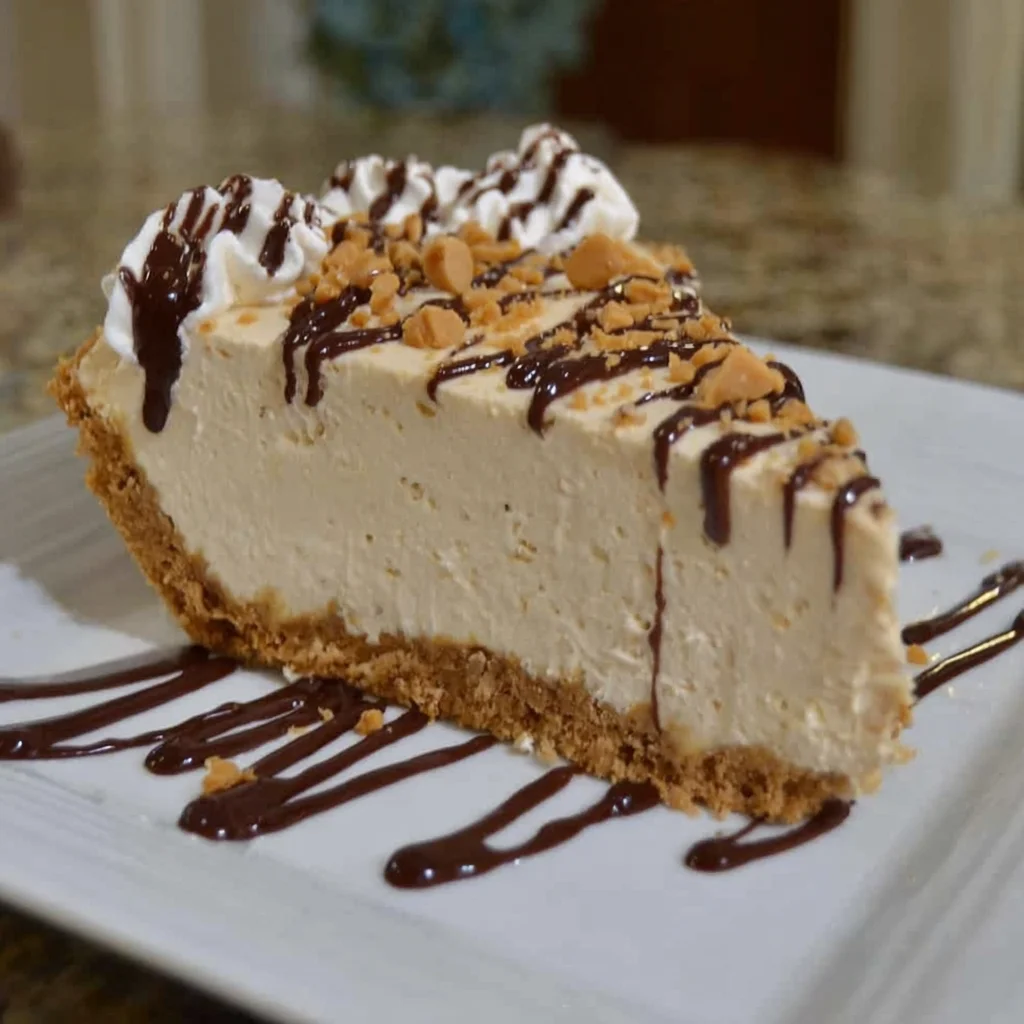
- Impressive Presentation: Despite its ease of preparation, this No Bake Peanut Butter Pie boasts an impressive presentation. The creamy, smooth filling contrasts beautifully with the golden-brown crust, creating a dessert that looks as good as it tastes. It’s perfect for impressing guests without hours of slaving over a hot oven.
- Perfect for Any Occasion: This versatile dessert fits any occasion. Whether it’s a casual weeknight treat, a summer barbecue, or an elegant dinner party, this No Bake Peanut Butter Pie is sure to be a hit. Its simplicity and deliciousness make it appropriate for both informal and formal gatherings.
Why You Should Try This No Bake Peanut Butter Pie Recipe
In a world of complicated desserts, this No Bake Peanut Butter Pie stands out for its simplicity and its unwavering ability to satisfy your sweet tooth. Here’s why you should give it a try:
- Deliciously Satisfying: The rich, creamy peanut butter filling provides a satisfying indulgence that’s hard to resist. The combination of creamy peanut butter and sweet condensed milk creates a texture that is both smooth and decadent. The contrast with the crunchy graham cracker crust adds another layer of textural interest, making each bite a memorable experience.
- Perfect for Beginners: This recipe is incredibly beginner-friendly. Even if you’re new to baking, you can confidently tackle this recipe and create a delicious dessert. The straightforward instructions and readily available ingredients make it ideal for aspiring bakers who want to build confidence in the kitchen.
- Cost-Effective: The ingredients are inexpensive and readily available at most grocery stores. This means you can enjoy a delicious dessert without breaking the bank. This makes it an excellent choice for those who are budget-conscious without sacrificing quality or flavor.
- Make-Ahead Dessert: This No Bake Peanut Butter Pie is a fantastic make-ahead dessert. You can prepare it hours or even a day in advance, allowing you to relax and enjoy your gathering without last-minute stress. The chilling time allows the flavors to meld and the pie to set properly, enhancing the overall experience.
- A Classic with a Twist: While it’s a classic dessert, this recipe provides a perfect balance of familiarity and novelty. The ease of preparation allows you to focus on enjoying the process and sharing the delicious result with others, making it a memorable experience for both the maker and the eater.
Ingredients and Necessary Utensils for Your No Bake Peanut Butter Pie
This section details the essential ingredients and recommended utensils for perfect No Bake Peanut Butter Pie making. Using high-quality ingredients will dramatically enhance the final product’s taste and texture. Precise measurements are crucial for achieving the ideal consistency.
Ingredients:
- For the Crust:
- 1 ½ cups graham cracker crumbs (secondary keyword: graham cracker crust)
- ¼ cup granulated sugar
- 6 tablespoons (3 ounces) unsalted butter, melted (secondary keyword: melted butter)
- For the Filling:
- 1 (14 ounce) can sweetened condensed milk (secondary keyword: sweetened condensed milk)
- 1 cup creamy peanut butter (secondary keyword: creamy peanut butter) – choose your favorite brand! Natural peanut butter may require a bit more stirring to blend smoothly.
- 1 cup heavy cream, cold (secondary keyword: whipped cream)
- 1 teaspoon vanilla extract (secondary keyword: vanilla extract)
Recommended Utensils:
- 9-inch pie plate: This is the standard size for this recipe, but you could adapt it to a smaller or larger pie plate if needed. Just remember to adjust baking times accordingly.
- Medium bowl: For combining the graham cracker crumbs, sugar, and melted butter for the crust.
- Large bowl: For mixing the peanut butter filling.
- Measuring cups and spoons: For accurate ingredient measurements. Precise measurements are key to achieving the right consistency and flavor.
- Rubber spatula or wooden spoon: Helpful for scraping down the sides of the bowls while mixing.
- Electric mixer (handheld or stand): Makes whipping the heavy cream much easier and faster. While you can whip it by hand, it will require significantly more effort.
- Measuring cup or glass: For pressing the crust evenly into the pie plate. A flat-bottomed item works best for a uniform crust.
- Fork: For potentially mixing the crust ingredients in a pinch if you lack a spoon.
- Refrigerator: For chilling the crust and setting the pie. Allowing sufficient chilling time is crucial for the pie to set properly and achieve the desired consistency.
Detailed Recipe Steps for Your No Bake Peanut Butter Pie
Follow these step-by-step instructions to create the perfect No Bake Peanut Butter Pie. Remember, patience and attention to detail are key to ensuring a beautifully smooth and delicious pie.
Get Started:
- Prepare your ingredients: Make sure all your ingredients are at room temperature except the heavy cream, which should be well-chilled. This ensures optimal blending and whipping.
Make the Crust:
- Combine dry ingredients: In a medium bowl, combine the graham cracker crumbs and granulated sugar. Mix well to ensure the sugar is evenly distributed throughout the crumbs.
- Add melted butter: Gradually add the melted unsalted butter to the crumb mixture. Stir continuously until the crumbs are evenly moistened and begin to clump together. Don’t overmix, as this can result in a tough crust.
- Press into pie plate: Firmly press the crumb mixture into the bottom of a 9-inch pie plate. Use the bottom of a measuring cup or a glass to create an even layer and ensure consistent thickness. **A well-pressed crust is crucial for preventing a soggy bottom.**
- Chill the crust: Place the pie plate in the refrigerator to chill the crust while you prepare the filling. This helps the crust firm up and prevents it from getting soggy from the filling.
Make the Filling:
- Combine peanut butter and condensed milk: In a large bowl, beat the sweetened condensed milk and peanut butter together using an electric mixer or a whisk until they are completely smooth and creamy. **Ensure there are no lumps of peanut butter.**
- Whip the heavy cream: In a separate bowl, beat the cold heavy cream with an electric mixer until stiff peaks form. This is essential for achieving a light and airy filling. **Be careful not to overwhip, as this can result in a grainy texture.**
- Fold in whipped cream and vanilla: Gently fold the whipped cream into the peanut butter mixture along with the vanilla extract. Use a spatula or a spoon and fold in a circular motion to incorporate the whipped cream without deflating it. **Avoid overmixing, as this can make the filling dense.**
Assemble and Chill the Pie:
- Pour filling into crust: Pour the peanut butter filling over the chilled graham cracker crust and spread it evenly across the surface. Use a spatula to ensure a smooth, even layer.
- Refrigerate: Refrigerate the pie for at least 4 hours, or preferably overnight, to allow the filling to set completely. The longer it chills, the firmer and more stable the filling will be. This step is crucial for a well-set, delicious pie.
Tips and Variations for Your No Bake Peanut Butter Pie
Here are some helpful tips and variations to enhance your No Bake Peanut Butter Pie experience:
- Crust Variations: Experiment with different crusts! Use chocolate graham crackers for a richer flavor or try a digestive biscuit crust for a slightly different texture. You could even use a pre-made graham cracker crust for an even quicker process.
- Peanut Butter Alternatives: Use different types of peanut butter, such as crunchy peanut butter, for added texture or try almond butter or sunflower seed butter for a unique twist. Just be aware that the consistency might change slightly.
- Add-ins: Enhance your pie by incorporating add-ins to the filling. Chocolate chips, chopped peanuts, pretzels, or even cookie dough pieces can elevate the flavor profile.
- Vegan Version: Replace the heavy cream with full-fat coconut cream for a vegan-friendly version. Use vegan butter for the crust and ensure your peanut butter is vegan.
- Gluten-Free Version: Use gluten-free graham cracker crumbs or make your own crust using gluten-free digestive biscuits or almond flour.
- Preventing Soggy Crust: Ensure the crust is completely chilled before adding the filling. This will prevent it from becoming soggy.
- Overwhipping the Cream: Be careful not to overwhip the heavy cream. Overwhipped cream can become grainy and affect the texture of the filling.
Nutritional Values and Health Benefits of Your No Bake Peanut Butter Pie
While this No Bake Peanut Butter Pie is undeniably indulgent, let’s explore the nutritional aspects and potential benefits of its ingredients.
Note: The following nutritional information is an estimate and may vary based on the specific brands and ingredients used. For precise nutritional information, it is recommended to use a nutrition calculator with your specific ingredients.
A typical slice of No Bake Peanut Butter Pie contains approximately:
- Calories: Around 400-500 calories per slice
- Protein: Moderate amount from the peanut butter and heavy cream.
- Fats: Higher fat content, primarily from the peanut butter, butter, and heavy cream.
- Carbohydrates: Comes mainly from the graham cracker crumbs and sweetened condensed milk.
Health Benefits of Ingredients:
- Peanut Butter: A good source of protein and healthy fats, also provides essential vitamins and minerals.
- Graham Crackers: While not a nutritional powerhouse, they contribute a source of fiber.
- Heavy Cream: Contains calcium and some fat-soluble vitamins, but should be consumed in moderation.
It’s important to enjoy this dessert in moderation as part of a balanced diet. This pie is best considered an occasional treat rather than a regular dietary staple.
FAQs about No Bake Peanut Butter Pie
How long does a No Bake Peanut Butter Pie last in the refrigerator?
Can I freeze a No Bake Peanut Butter Pie?
What can I substitute for heavy cream in a No Bake Peanut Butter Pie?
How can I make my No Bake Peanut Butter Pie crust crispier?
Is it necessary to use an electric mixer for this recipe?
Conclusion: Your No Bake Peanut Butter Pie Journey
This No Bake Peanut Butter Pie recipe is a delightful journey into the world of easy yet impressive desserts. Its simplicity, customizable nature, and incredible taste make it a perfect choice for any occasion. Whether you’re a seasoned baker or just starting your culinary adventure, this recipe is sure to become a favorite in your repertoire. So, gather your ingredients, follow these steps, and prepare for a creamy, dreamy dessert experience that will leave you wanting more! Don’t forget to share your creations and experiences with us in the comments section below – we’d love to hear from you! And if you’re looking for more delicious no-bake recipes, check out our other amazing recipes on our blog, like these delicious treats!
Happy Baking!
No-Bake Peanut Butter Pie
Ingredients
Equipment
Method
- In a medium bowl, combine graham cracker crumbs and sugar. Stir in melted butter until evenly moistened.
- Press the crumb mixture firmly into the bottom of a 9-inch pie plate. Use the bottom of a measuring cup or glass to ensure an even layer.
- Refrigerate the crust while you make the filling.
- In a large bowl, beat the sweetened condensed milk and peanut butter together until smooth and creamy.
- In a separate bowl, beat the cold heavy cream with an electric mixer until stiff peaks form.
- Gently fold the whipped cream into the peanut butter mixture along with the vanilla extract, until just combined. Be careful not to overmix.
- Pour the peanut butter filling over the chilled graham cracker crust and spread evenly.
- Refrigerate for at least 4 hours, or preferably overnight, to allow the pie to set completely.


