Chocolate fudge. Just the words themselves evoke images of rich, creamy squares, melting on your tongue, a perfect indulgence for any occasion. This easy chocolate fudge recipe is the answer to your chocolate cravings. It’s incredibly simple, requiring minimal ingredients and even less time, yet the result is a decadent dessert that rivals anything you’d find in a fancy chocolatier. Forget complicated techniques and long baking times; this recipe is all about effortless deliciousness. Whether you’re a seasoned baker or a complete novice, you’ll be amazed at how quickly and easily you can whip up a batch of this rich, smooth fudge. It’s perfect for sharing (or not!), gifting to friends and family, or simply enjoying a square (or two!) for yourself after a long day. Get ready to experience chocolate heaven – the easy way!
Why You’ll Love This Chocolate Fudge Recipe
This easy chocolate fudge recipe isn’t just about simplicity; it’s about achieving incredible flavor and texture with minimal effort. Let’s delve into why this recipe will quickly become a favorite in your kitchen:
- Simplicity: With just a handful of readily available ingredients, this recipe is incredibly easy to follow. Even beginner bakers will find success.
- Speed: From start to finish, this fudge comes together in under 15 minutes. It’s the perfect last-minute dessert solution.
- Versatility: The base recipe is easily customizable. Add nuts, chocolate shavings, pretzels, or any other mix-ins you desire for a personalized touch. Experiment with different types of chocolate chips for varied flavor profiles. You can even add a pinch of espresso powder for an intense mocha fudge!
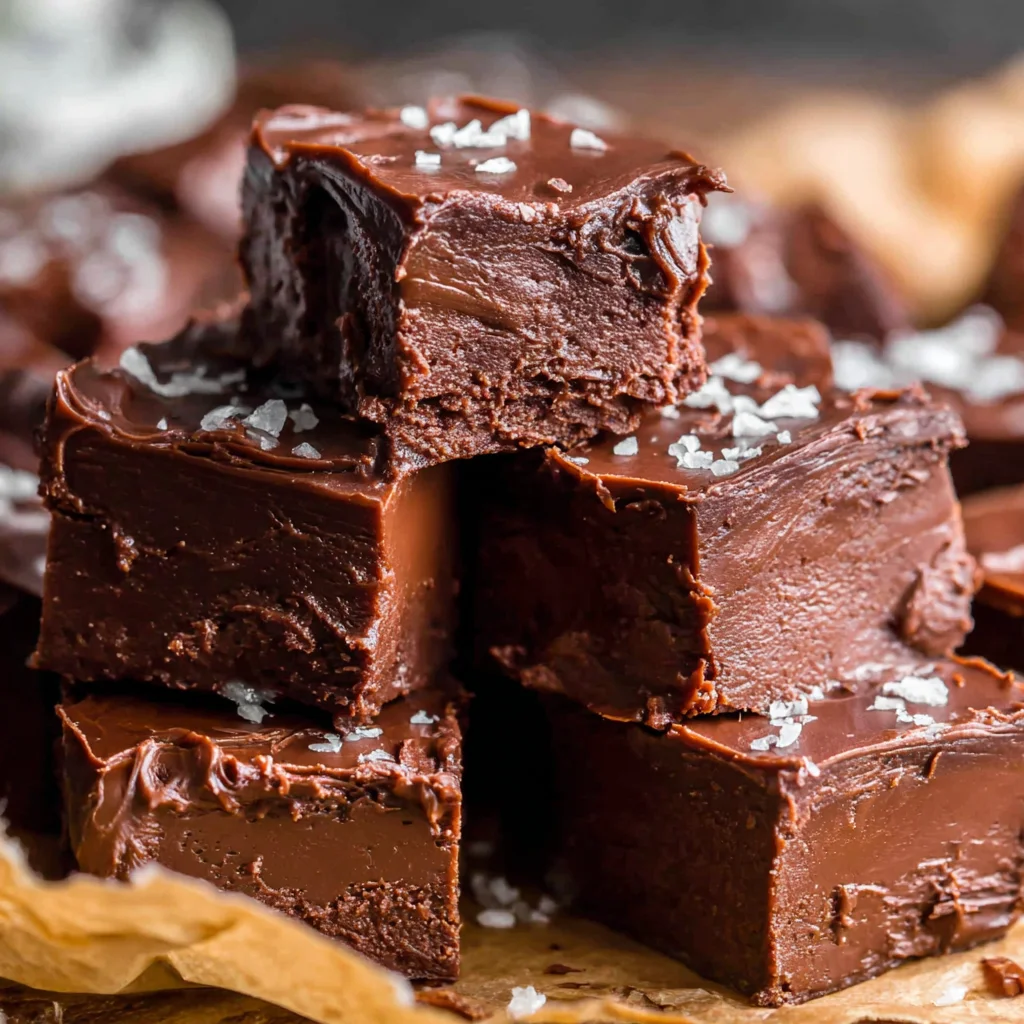
- Rich and Creamy Texture: The combination of sweetened condensed milk and butter creates an unbelievably smooth and creamy fudge, unlike any other. The texture is perfectly fudgy and melts in your mouth.
- Unbeatable Flavor: The rich, deep chocolate flavor is perfectly balanced by the sweetness of the condensed milk. It’s the ultimate chocolate indulgence.
- Make-Ahead Convenience: This fudge needs to chill for at least two hours, allowing you to prepare it well in advance of your event or gathering. It’s perfect for potlucks or holiday parties.
Beyond the ease and deliciousness, this chocolate fudge is a great way to impress guests without spending hours in the kitchen. The beautiful, glossy finish and rich aroma alone will be enough to tantalize tastebuds and create lasting memories. It’s a recipe that speaks volumes about thoughtful preparation without the stress of complicated procedures.
Why You Should Try This Chocolate Fudge Recipe
In a world of overly complicated dessert recipes, this easy chocolate fudge stands out as a beacon of simplicity and deliciousness. Here are compelling reasons why you should give this recipe a try:
- Perfect for Beginners: This recipe is a fantastic introduction to the world of baking. Its straightforward instructions and minimal ingredients make it ideal for those new to the kitchen. It builds confidence and encourages further baking adventures.
- Impress Your Guests: This decadent fudge is a guaranteed crowd-pleaser, perfect for parties, holidays, or simply sharing with loved ones. The rich flavor and elegant presentation elevate it beyond a simple dessert.
- Cost-Effective: The ingredients are inexpensive and readily available in most grocery stores. This makes it a budget-friendly way to enjoy a luxurious treat.
- Customizable Delight: Feel free to get creative and personalize your fudge. Experiment with various mix-ins to create unique flavor combinations that perfectly match your preferences or the occasion.
- A Satisfying Experience: The process of making this fudge is remarkably satisfying. The melting chocolate, the smooth stirring, and the anticipation of the final product combine to create a delightful culinary experience.
- A Perfect Gift: Cut into neat squares and beautifully packaged, this chocolate fudge makes a fantastic homemade gift for friends, family, neighbors, or colleagues. It’s a gesture of care and deliciousness.
This recipe isn’t just about creating a delicious dessert; it’s about the joy of creating something special with ease and simplicity. It’s a perfect recipe for sharing the love of baking with others, and a wonderful opportunity to bond with loved ones in the kitchen.
Ingredients and Necessary Utensils for the Best Chocolate Fudge
The success of any recipe hinges on the quality of the ingredients and the proper tools. Let’s explore what you’ll need to create the perfect batch of this easy chocolate fudge:
Ingredients: A Detailed List
- 1 (12-ounce) package semi-sweet chocolate chips: This is the star of the show! Choose a high-quality brand for the best flavor. Consider using a blend of dark and semi-sweet chocolate chips for a more complex flavor profile.
- 1 (14-ounce) can sweetened condensed milk: This provides the creamy texture and sweetness. Don’t substitute with evaporated milk; the results will be significantly different.
- 1/2 cup (1 stick) unsalted butter, cut into pieces: Unsalted butter gives you control over the salt level and enhances the richness of the fudge. Make sure your butter is softened, but not melted.
- 1 teaspoon vanilla extract: A touch of vanilla enhances the chocolate flavor and adds depth. Use pure vanilla extract for the best results.
- Pinch of salt: A pinch of salt balances the sweetness and enhances the chocolate flavor. Don’t skip this ingredient; it’s essential for a well-balanced fudge.
- Optional Mix-ins (1/2 cup): The fun part! Experiment with your favorites. Popular choices include chopped nuts (walnuts, pecans, or peanuts), mini marshmallows, chocolate shavings, pretzels, sea salt flakes, or even dried fruit. Be creative!
Utensils: Your Culinary Arsenal
- Medium saucepan: Choose a saucepan with a heavy bottom to prevent scorching. A non-stick saucepan is preferable.
- 8×8 inch baking pan: This is the standard size for this recipe. A 9×9 inch pan will result in thinner fudge.
- Parchment paper: Essential for easy removal of the fudge from the pan. Line the pan completely, leaving an overhang on two sides for easy lifting.
- Wooden spoon or spatula: For stirring the fudge mixture. A heat-resistant spatula is recommended.
- Measuring cups and spoons: For accurate measurements of ingredients.
- Rubber spatula or offset spatula: For spreading the fudge evenly in the pan. This ensures an even thickness and pleasing aesthetic appearance.
- Knife or pizza cutter: For cutting the fudge into squares once set.
Having these utensils on hand will make the process much smoother and ensure your chocolate fudge turns out perfectly.
Detailed Recipe Steps: Creating Your Chocolate Fudge Masterpiece
Let’s embark on the journey of creating this delicious chocolate fudge. Follow these detailed steps for optimal results:
- Prepare the pan: Line your 8×8 inch baking pan with parchment paper, ensuring that there’s an overhang on two opposite sides. This will allow you to easily lift the fudge out of the pan once it’s set. This step is crucial for preventing sticking and ensuring a clean presentation.
- Combine ingredients: In your medium saucepan, combine the chocolate chips, sweetened condensed milk, butter pieces, vanilla extract, and salt. Ensure the butter is cut into small pieces for quicker melting.
- Melt the chocolate: Place the saucepan over medium-low heat. Stir frequently, using your wooden spoon or spatula, ensuring all ingredients are well incorporated. The chocolate will melt gradually. Be patient and avoid high heat; this can cause the chocolate to scorch or seize. Consistent, gentle stirring is key.
- Achieve a smooth consistency: Continue stirring until the chocolate is completely melted and the mixture is smooth and glossy. This should take about 5-7 minutes. If the mixture starts to thicken too quickly, reduce the heat slightly.
- Incorporate mix-ins (optional): Remove the saucepan from the heat and gently stir in your chosen mix-ins, if using. Be careful not to overmix, as this can cause the mix-ins to clump together.
- Pour and spread: Pour the fudge mixture into the prepared baking pan and spread it evenly using your rubber spatula or offset spatula. Make sure there are no air bubbles or uneven patches for a uniform texture and appearance.
- Refrigerate: Refrigerate the fudge for at least 2 hours, or until it is completely firm. The longer it chills, the firmer it will become.
- Lift and cut: Once firm, lift the fudge out of the pan using the parchment paper overhang. Cut it into squares using a sharp knife or pizza cutter. For clean cuts, wipe your knife with a damp cloth after each cut.
- Serve and enjoy: Serve your homemade chocolate fudge and enjoy! Store any leftover fudge in an airtight container in the refrigerator.
Following these detailed steps will guarantee a delightful and seamless chocolate fudge making experience.
Tips and Variations: Elevating Your Chocolate Fudge
While this recipe is incredibly simple, there are ways to customize it and avoid common pitfalls. Here are some tips and variations to consider:
- Different types of chocolate: Experiment with dark chocolate, milk chocolate, or even white chocolate chips for varied flavor profiles. A blend of dark and milk chocolate creates a wonderfully rich and balanced fudge.
- Flavor enhancements: Add a pinch of sea salt for a sweet and salty contrast, a teaspoon of instant espresso powder for a mocha flavor, or a splash of orange extract for a zesty twist.
- Mix-in magic: Get creative with your mix-ins! Try chopped nuts, dried fruit, pretzels, caramel candies, or even cookie crumbs. The possibilities are endless.
- Vegan fudge: Substitute the butter with vegan butter and the milk with a plant-based milk alternative (like coconut milk or almond milk), ensuring the sweetened condensed milk is also vegan-friendly. You might need to adjust the amount of plant-based milk to achieve desired consistency.
- Gluten-free fudge: Ensure that all your ingredients, including the chocolate chips and any mix-ins, are certified gluten-free.
- Avoid scorching: Use low to medium-low heat when melting the chocolate and stir constantly to prevent scorching.
- Proper chilling: Allow the fudge to chill for at least two hours to ensure it sets properly. Over-chilling won’t hurt, but under-chilling will result in soft fudge.
These tips and variations allow for a personalized chocolate fudge experience, tailored perfectly to your taste preferences.
Nutritional Values and Benefits of this Chocolate Fudge
While chocolate fudge is undeniably a treat, it’s important to understand its nutritional profile. A typical serving (approximately 1 ounce or 1 square) of this chocolate fudge contains approximately:
- Calories: 150-200 (depending on mix-ins)
- Protein: 2-3 grams
- Fat: 8-10 grams (primarily saturated fat)
- Carbohydrates: 18-22 grams (including sugars)
Note: These values are estimates and can vary based on the specific brands of ingredients used and the addition of any mix-ins. It’s always best to consult a nutrition calculator for a more precise analysis, taking into account your specific ingredients.
However, let’s not forget the potential benefits of the ingredients:
- Dark chocolate (if used): Dark chocolate is known for its antioxidant properties and potential health benefits, including improved cardiovascular health and reduced inflammation (when consumed in moderation).
- Milk (from butter and condensed milk): Provides calcium, important for bone health.
- Nuts (if used): Nuts are a good source of healthy fats, protein, fiber, and various vitamins and minerals. Choose nuts rich in unsaturated fats for maximum health benefits.
Remember, moderation is key when enjoying this delicious chocolate fudge. It’s meant to be an occasional treat, not a daily staple.
FAQs about Chocolate Fudge
How long does chocolate fudge last?
Can I freeze chocolate fudge?
What happens if I overheat the chocolate while making fudge?
Can I make this chocolate fudge recipe without a double boiler?
What are some creative variations for this chocolate fudge?
Conclusion: Indulge in Your Homemade Chocolate Fudge
This easy chocolate fudge recipe is a testament to the fact that deliciousness doesn’t have to be complicated. With minimal ingredients, simple steps, and a little patience, you can create a rich, creamy, and utterly irresistible treat that will impress even the most discerning chocolate lovers. Remember to use high-quality ingredients and follow the instructions carefully for best results. Don’t be afraid to experiment with different flavors and mix-ins to create your own signature chocolate fudge. Share your creations and tag us on social media! For more delicious dessert recipes, check out our blog and discover more baking inspiration! And for another decadent chocolate treat, try our White Chocolate Fudge!
We encourage you to try this recipe and share your experience in the comments below. Let us know what mix-ins you used, and how your chocolate fudge turned out. Happy baking!
This recipe is sure to be a new family favorite. Don’t hesitate to pin this recipe to your Pinterest board for later. Check out our other amazing recipes on our Pinterest page!
Easy No-Bake Chocolate Fudge
Ingredients
Equipment
Method
- Line an 8x8 inch baking pan with parchment paper, leaving an overhang on two sides for easy removal.
- In a medium saucepan over medium-low heat, combine chocolate chips, sweetened condensed milk, butter, and salt.
- Stir frequently until the chocolate is completely melted and the mixture is smooth and creamy. This should take about 5-7 minutes. Avoid high heat to prevent burning.
- Remove from heat and stir in vanilla extract and optional heavy cream. If using, gently fold in the chopped walnuts.
- Pour the fudge mixture into the prepared baking pan and spread evenly using a spatula.
- Refrigerate for at least 2 hours, or until firm.
- Once firm, lift the fudge out of the pan using the parchment paper overhang. Cut into squares and serve. Enjoy!


