Whipped shortbread cookies are the epitome of buttery, melt-in-your-mouth deliciousness. These delightful treats are surprisingly simple to make, requiring minimal ingredients and even less effort. Forget complicated baking techniques and hours spent in the kitchen; this recipe delivers maximum flavor with minimum fuss. Imagine the rich, crumbly texture, the delicate sweetness, and that irresistible buttery aroma filling your home. Whether you’re a seasoned baker or a kitchen novice, these whipped shortbread cookies are a perfect project for any occasion – from casual afternoon tea to elegant holiday gatherings. They’re equally charming served alongside a steaming cup of coffee or a glass of chilled milk. Get ready to experience the pure joy of a perfectly executed, utterly addictive shortbread cookie.
Why You’ll Love This Whipped Shortbread Cookies Recipe
This recipe for whipped shortbread cookies isn’t just another cookie recipe; it’s a baking experience that will leave you feeling accomplished and utterly satisfied. What truly sets it apart is its incredible ease. With just a few simple steps, you’ll be creating cookies that taste like they came from a high-end bakery. The secret lies in the “whipped” method, which incorporates air into the butter and sugar, resulting in a lighter, more delicate texture than traditional shortbread. This technique is surprisingly simple, but it makes all the difference in the final product.
Beyond its simplicity, this recipe is incredibly versatile. The basic dough provides a perfect canvas for customization. Feel free to experiment with different flavorings, like lemon zest, cinnamon, or even a hint of sea salt. You can also add nuts, chocolate chips, or dried fruit to create unique variations. The possibilities are truly endless, allowing you to tailor the cookies to your exact preferences and the occasion. Whether you prefer a classic, understated shortbread or a more adventurous flavor combination, this recipe has you covered. The beautiful, slightly rustic appearance of these cookies makes them perfect for gifting, too. Imagine the delighted faces of your friends and family as they receive a tin of these homemade goodies.
Furthermore, the recipe is incredibly forgiving. Even if your measurements aren’t perfectly precise, the cookies will still turn out delicious. This makes it ideal for both beginner and experienced bakers alike. You don’t need any special equipment, just your standard baking tools. And the clean-up is a breeze, leaving you more time to enjoy the fruits of your labor. So, if you’re looking for a foolproof recipe that consistently delivers exceptional results, look no further than these delightful whipped shortbread cookies.
Why You Should Try This Whipped Shortbread Cookies Recipe
In a world overflowing with baking recipes, this recipe for whipped shortbread cookies stands out for its exceptional combination of taste, texture, and simplicity. These aren’t just any cookies; they’re an experience. The light and airy texture is achieved through the careful creaming of the butter and sugar, a technique that incorporates air into the dough, resulting in cookies that are both delicate and delightfully crumbly. The rich, buttery flavor is intensified by the use of high-quality ingredients. The result is a shortbread that’s both incredibly flavorful and wonderfully light, a true testament to the power of simple ingredients used expertly.
Beyond the exquisite taste and texture, this recipe provides an opportunity for creative expression. The basic recipe is easily adaptable to your personal preferences. Want a hint of citrus? Add some lemon zest. Craving spice? A dash of cinnamon or nutmeg would be wonderful. Feeling adventurous? Incorporate chopped nuts, dried cranberries, or even a swirl of melted chocolate. The possibilities are limitless, ensuring that you can create a version of this cookie that perfectly suits your palate and complements your occasion. This adaptability makes this recipe far more than just a set of instructions; it’s a gateway to culinary exploration.
Finally, consider the sheer satisfaction of making something delicious from scratch. These cookies are not only easy to make, they’re incredibly satisfying to bake. The process itself is therapeutic, allowing you to unwind and de-stress in the kitchen. The aroma of freshly baked shortbread wafting through your home is an added bonus, creating a warm and inviting atmosphere. The resulting cookies are perfect for sharing, making them an ideal treat for gatherings or gifting. Whether you’re impressing guests or simply rewarding yourself with a well-deserved treat, these whipped shortbread cookies are a guaranteed win.
Ingredients and Necessary Utensils for Whipped Shortbread Cookies
This recipe for **whipped shortbread cookies** utilizes a simple yet effective combination of ingredients to achieve a delightful outcome. The precision of measurements is key to achieving the perfect balance of flavors and textures.
- Unsalted Butter: 1 cup (2 sticks), softened. Using unsalted butter allows you to control the level of saltiness in your cookies. Make sure your butter is softened to room temperature for optimal creaming. This is crucial for achieving the light and airy texture.
- Granulated Sugar: 1 cup. This provides the sweetness of the cookies. Granulated sugar is preferred for its ability to dissolve easily and create a smooth, creamy texture.
- Vanilla Extract: 1 teaspoon. This enhances the flavor of the cookies. A high-quality vanilla extract will significantly elevate the overall taste.
- All-Purpose Flour: 2 1/2 cups. This is the primary structural component of the cookies. Ensure your flour is fresh and properly measured for best results. Using a kitchen scale for precision is recommended.
- Salt: 1/4 teaspoon. This balances the sweetness and enhances the overall flavor profile. A pinch of salt can often make a big difference in baking.
Beyond the ingredients, having the right tools can make the baking process smoother and more enjoyable:
- Electric Mixer (Stand or Handheld): Highly recommended for creaming the butter and sugar effectively. While it’s possible to do this by hand, an electric mixer will significantly reduce the effort and time required.
- Large Mixing Bowls (at least two): One for creaming the butter and sugar, and another for whisking together the dry ingredients. Using separate bowls helps prevent lumps in the dough.
- Whisk: For smoothly combining the dry ingredients. A whisk ensures no lumps form when combining the flour and salt.
- Measuring Cups and Spoons: Accurate measurements are crucial in baking. Using measuring cups and spoons that are properly calibrated will lead to better results.
- Baking Sheets: Two are recommended for efficient baking. This allows you to bake more cookies simultaneously, saving time.
- Parchment Paper: This prevents the cookies from sticking to the baking sheets and makes for easier clean-up. Using parchment paper is highly recommended.
- Fork: For creating the signature criss-cross pattern on top of the cookies. This adds a decorative touch and allows for even cooking.
- Cookie Scoop (optional): This ensures that all your cookies are uniformly sized, leading to even baking.
- Wire Rack: For cooling the cookies after baking. This prevents the cookies from becoming soggy by allowing air circulation.
With these simple ingredients and readily available tools, you’re well-equipped to embark on your whipped shortbread cookie baking adventure! Remember, clean workspace and preparation always aid in a stress-free and enjoyable experience!
Detailed Recipe Steps for Whipped Shortbread Cookies
Follow these step-by-step instructions to create perfect whipped shortbread cookies every time. Pay attention to detail, and you will be rewarded with light, airy, and melt-in-your-mouth cookies.
- Cream Butter and Sugar: In your large mixing bowl, cream together the softened unsalted butter and granulated sugar using an electric mixer. Beat for at least 3-5 minutes, or until the mixture is light, fluffy, and pale in color. This step is crucial for incorporating air into the dough, which creates the characteristic lightness of the cookies. If using a hand mixer, this may require some significant effort – be prepared for a mini arm workout!
- Add Vanilla: Once the butter and sugar mixture is light and fluffy, stir in the vanilla extract. Mix until evenly combined. Don’t overmix; you just want the vanilla incorporated into the butter-sugar cream.
- Incorporate Dry Ingredients: In a separate bowl, whisk together the all-purpose flour and salt. Gradually add the dry ingredients to the wet ingredients, mixing on low speed with your electric mixer. Mix only until the ingredients are just combined. Overmixing will develop the gluten in the flour, resulting in tough cookies. The dough will be relatively soft.
- Chill the Dough: Cover the bowl and refrigerate the dough for at least 30 minutes. Chilling the dough firms it up, making it easier to handle and preventing the cookies from spreading excessively during baking. You can even chill the dough for up to 2 hours, or even overnight, if desired.
- Preheat Oven & Prepare Baking Sheet: Preheat your oven to 325°F (160°C). Line your baking sheets with parchment paper. This step is critical for even baking and easy clean-up.
- Shape the Cookies: Roll the chilled dough into 1-inch balls. Place the balls onto the prepared baking sheets, leaving about 2 inches between each cookie. Gently flatten each ball slightly with a fork, creating a criss-cross pattern on top. This not only adds visual appeal but also allows for better heat distribution during baking.
- Bake: Bake for 12-15 minutes, or until the edges are just beginning to turn golden brown. Keep a close eye on the cookies, as ovens vary. Start checking for doneness around the 12-minute mark. A slightly underbaked cookie is better than one that’s overbaked.
- Cool: Let the cookies cool on the baking sheets for a few minutes before transferring them to a wire rack to cool completely. Cooling the cookies on the baking sheets prevents them from breaking. Allow them to cool completely before storing to maintain their texture.
Once cooled, store your delicious whipped shortbread cookies in an airtight container at room temperature. They will stay fresh and delicious for several days, though they rarely last that long!
Tips and Variations for Whipped Shortbread Cookies
While the basic recipe is delicious on its own, there are several ways you can customize your whipped shortbread cookies to create unique and exciting flavors.
- Flavor Variations: Experiment with different extracts like almond, lemon, or orange. Adding a pinch of cinnamon, nutmeg, or cardamom can also create warm and comforting cookies. A sprinkle of sea salt on top before baking adds a delightful contrast to the sweetness.
- Add-ins: Incorporate chopped nuts (almonds, pecans, walnuts), dried fruits (cranberries, chopped apricots), or chocolate chips into the dough for added texture and flavor. Be mindful not to add too many add-ins, as this may affect the texture of the cookies.
- Gluten-Free Option: Substitute all-purpose flour with a gluten-free blend designed for baking. You may need to adjust the amount of flour slightly, depending on the specific blend you use.
- Vegan Option: Replace the butter with a vegan butter alternative. Make sure it’s firm enough at room temperature to cream properly. Some vegan butters may require chilling before use.
- Shaping Variations: Instead of rolling the dough into balls and flattening them with a fork, try using cookie cutters to create fun shapes. You can also press the dough into a baking dish for a slab shortbread.
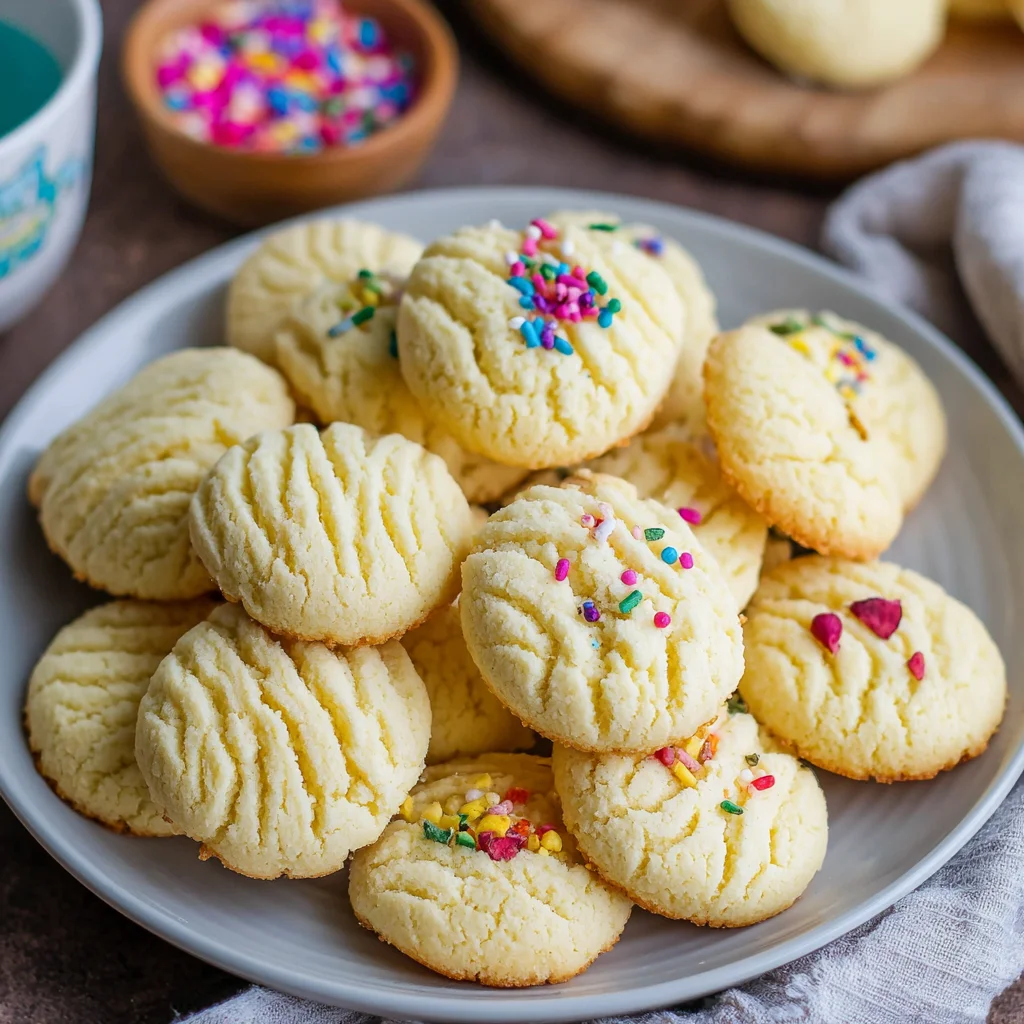
- Glazing and Decoration: Once cooled, you can drizzle melted chocolate, powdered sugar, or a simple glaze over the cookies. You can also decorate them with sprinkles, edible glitter, or other festive toppings. Get creative and have fun with it!
Common Mistakes to Avoid:
- Overmixing the Dough: Overmixing will develop the gluten in the flour, resulting in tough cookies. Mix only until the ingredients are just combined.
- Not Chilling the Dough: Chilling the dough is essential for preventing the cookies from spreading too much during baking. Allow the dough to chill for at least 30 minutes.
- Overbaking the Cookies: Overbaked cookies will be dry and crumbly. Start checking for doneness around the 12-minute mark and bake until the edges are just beginning to turn golden brown.
- Using Cold Butter: Ensure the butter is softened to room temperature for optimal creaming and a lighter texture.
Nutritional Values and Benefits of Whipped Shortbread Cookies
While whipped shortbread cookies are undeniably indulgent, it’s helpful to understand their nutritional profile. A single cookie (approximately 1-inch diameter) contains approximately:
- Calories: 100-120
- Protein: 1-2 grams
- Fat: 6-8 grams
- Carbohydrates: 12-15 grams
Note: These are approximate values and can vary depending on the specific ingredients used. For precise nutritional information, use a nutrition calculator with your exact ingredient measurements.
The benefits of the ingredients used in this recipe are noteworthy. Butter, while high in fat, provides a rich flavor and contributes to the tender texture of the cookies. Flour provides the structural base for the cookies. Vanilla extract not only adds flavor but also possesses antioxidant properties. Finally, a touch of salt enhances the overall taste profile and balances the sweetness.
Remember, these cookies are best enjoyed in moderation as part of a balanced diet.
FAQs
How do I prevent my whipped shortbread cookies from spreading too much?
Can I freeze whipped shortbread cookies?
What kind of butter should I use for whipped shortbread cookies?
How long do whipped shortbread cookies last?
Can I make whipped shortbread cookies ahead of time?
Conclusion
These whipped shortbread cookies are a testament to the magic of simple baking. The light, airy texture, the rich buttery flavor, and the ease of preparation make them a truly irresistible treat. Whether you’re a seasoned baker or just starting out, this recipe is a guaranteed success. Remember to pay attention to the key steps, such as properly creaming the butter and sugar and chilling the dough, to achieve the best results.
Now it’s your turn! Give this recipe a try and share your experience in the comments below. Don’t forget to share your beautifully baked cookies on social media and tag us! And for more delicious recipes, check out our other delightful treats. For instance, check out these amazing recipes from our blog: 3-Ingredient Sausage Cream Cheese Dip and Creamy Caprese Pasta Salad. Happy baking!
And don’t forget to pin this recipe for later! Pinterest
Whipped Shortbread Cookies: Melt-in-Your-Mouth Delight
Ingredients
Equipment
Method
- Cream butter and sugar: In a large bowl, cream together the softened butter and granulated sugar using an electric mixer until light and fluffy (about 3-5 minutes).
- Add vanilla: Beat in the vanilla extract.
- Whisk dry ingredients: In a medium bowl, whisk together the flour and salt.
- Combine wet and dry: Gradually add the dry ingredients to the wet ingredients, mixing on low speed until just combined. Do not overmix.
- Chill the dough: Cover the bowl and refrigerate the dough for at least 30 minutes.
- Preheat oven & prepare baking sheet: Preheat oven to 325°F (160°C). Line baking sheets with parchment paper.
- Shape & bake: Roll the dough into 1-inch balls. Place onto prepared baking sheets, leaving 2 inches between each. Gently flatten with a fork, creating a criss-cross pattern. Bake for 12-15 minutes, or until edges are lightly golden.
- Cool & serve: Let cool on baking sheets for a few minutes before transferring to a wire rack to cool completely. Dust with powdered sugar, if desired.


