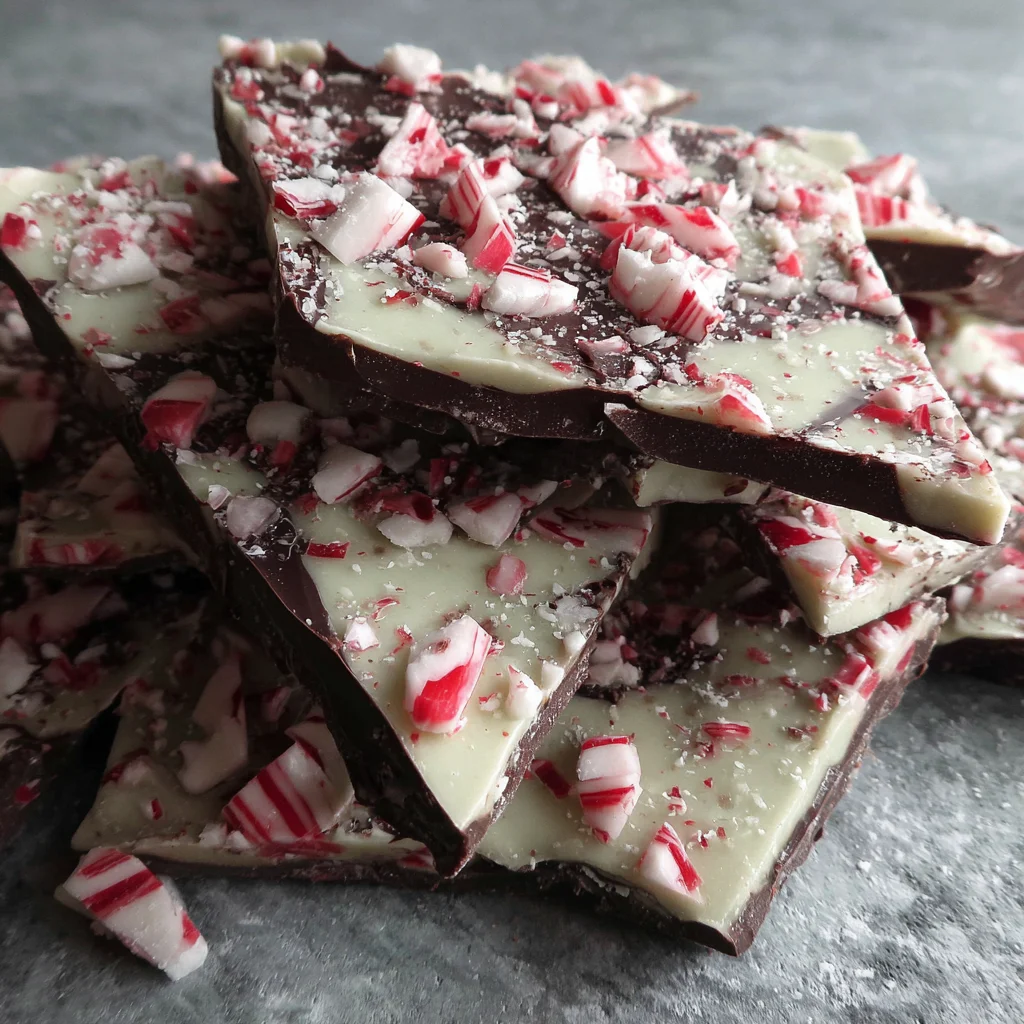
The holiday season simply wouldn’t be complete without the iconic crunch, the rich snap of chocolate, and the refreshing burst of mint provided by a perfect piece of Peppermint Bark. This irresistible candy, characterized by its striking layers of deep dark chocolate, creamy white chocolate, and vibrant red specks of crushed candy cane, is more than just a sweet treat it’s a festive tradition.
While store shelves are lined with pre-packaged versions, nothing compares to the quality, flavor, and immense satisfaction of making your own Peppermint Bark at home. This recipe guides you through creating a flawless, professional-grade batch using high-quality ingredients and simple, reliable melting techniques. Whether you are searching for the perfect edible gift, a dazzling addition to your holiday dessert platter, or just a simple, delightful indulgence, this two-layered chocolate sensation is the answer.
Forget complicated baking projects. Peppermint Bark is one of the easiest, most rewarding holiday confections you can make. It requires zero baking time, minimal active effort, and yields spectacular results every time. Get ready to transform simple ingredients into a festive masterpiece that captures the essence of Christmas in a single, snappy bite. Let’s dive into creating the very best homemade Peppermint Bark you’ve ever tasted, ensuring your holiday kitchen smells wonderfully minty and your counter is stocked with chocolatey goodness!
Why You’ll Love This Simple, Customizable Peppermint Bark Recipe
There are countless reasons why this specific recipe for homemade Peppermint Bark will become a staple in your holiday repertoire, standing head and shoulders above any store-bought alternative. It all comes down to control, quality, and the sheer joy of creation. When you follow this guide, you control the quality of the chocolate, the intensity of the mint, and the texture of the crushed peppermint, resulting in a candy customized perfectly to your palate.
Superior Quality and Flavor:
Mass-produced bark often relies on inferior chocolate that lacks the deep, complex flavor notes necessary for a truly premium treat. Our recipe explicitly calls for good quality dark and white chocolate. When you use better chocolate, the flavor profile elevates instantly. The dark chocolate provides a rich, slightly bitter counterpoint, while the white chocolate offers a creamy, buttery sweetness. This duality is the foundation of excellent Peppermint Bark. Furthermore, by using pure peppermint extract instead of artificial flavorings, you achieve a clean, bright mintiness that feels authentic and festive.
The Perfect Snap and Crunch:
The texture of Peppermint Bark is just as important as the taste. We aim for a beautiful, satisfying “snap” when the chocolate is broken, followed by the irresistible crunch of the candy canes. Achieving this crisp texture depends on proper melting techniques and sufficient chilling. We provide clear instructions (including the optional use of coconut oil or shortening in the dark layer) to ensure your chocolate sets perfectly, preventing a soft, dull chewiness. The generous layer of crushed candy canes adheres firmly to the cooling white chocolate, guaranteeing a delightful textural contrast in every single piece.
Effortless Elegance:
Despite its stunning appearance, this recipe requires surprisingly little effort. Unlike cookies that demand precise measuring and timing, or complex fudge that requires boiling and constant stirring, Peppermint Bark is inherently forgiving. The biggest challenges melting the chocolate and spreading it thinly are simplified here with clear, easy-to-follow steps. It’s an ideal project for beginner cooks, busy hosts, or anyone looking for a high-impact, low-stress holiday confection.
Ideal for Gifting and Sharing:
Homemade gifts carry immense sentimental value, and Peppermint Bark is perhaps the ultimate edible present. It is shelf-stable, travels well, and looks incredibly professional when packaged simply in cellophane bags or decorative tins. A batch of this bark yields a generous quantity, making it perfect for filling holiday treat baskets, giving to teachers and neighbors, or serving at large gatherings. Imagine the delight when your friends and family receive a gift of this rich, minty, homemade Christmas candy.
Why You Should Try Making This Easy Holiday Treat
Making Peppermint Bark at home isn’t just about saving money; it’s about embracing the spirit of the season through simple, rewarding kitchen activities. This two-toned Christmas confection provides practical benefits that make it a superior choice for your holiday dessert rotation.
A True Stress-Free Holiday Project:
The holidays are often synonymous with stress, especially when it comes to baking. Trying to wrangle dozens of sugar cookies or ensuring a gingerbread house stands upright can test anyone’s patience. Peppermint Bark eliminates this hassle. It is a no-bake wonder that requires just two hours of chilling time and about 20 minutes of active prep. The process is meditative: the sound of the candy canes crushing, the aroma of melting chocolate, and the satisfaction of seeing the vibrant white and dark layers come together. It’s the definition of low effort, high reward holiday magic.
Customization is Key:
When you buy pre-made bark, you are stuck with whatever thickness or ratio the manufacturer decided upon. By making your own, you become the artisan. Do you prefer a slightly thicker dark chocolate base? Done. Want to triple the amount of crushed candy canes on top? Absolutely! This recipe provides a foundational framework, but you can adjust the ratios of dark-to-white chocolate, the intensity of the peppermint, and even the type of candy cane used (think naturally colored or organic options if you want to avoid artificial dyes). This versatility is unmatched.
Perfect for Kids (With Supervision):
The preparation stages of this recipe are fantastic for involving younger family members. Kids can safely participate in lining the pan, crushing the candy canes (a truly therapeutic step!), and, most importantly, sprinkling the festive crushed pieces onto the wet white chocolate layer. This hands-on involvement creates cherished holiday memories and helps them feel invested in the treats they consume. Just remember, adult supervision is essential during the melting phase, as melted chocolate can be very hot.
Excellent Shelf Stability:
One of the major logistical advantages of Peppermint Bark is its longevity. Unlike delicate cakes or creamy pies that must be eaten within a day or two, solid chocolate bark keeps remarkably well. When stored correctly in an airtight container in a cool, dark place, it remains fresh, snappy, and delicious for up to two weeks at room temperature, and even longer when refrigerated. This means you can prepare large batches weeks ahead of time, freeing up precious kitchen time closer to Christmas Day. Need a quick holiday dessert idea? Check out our recipe for Hot Chocolate Fudge, another superb make-ahead option!
Ingredients and Essential Tools for Perfect Peppermint Bark
Achieving bakery-quality Peppermint Bark starts with quality ingredients. Since this is a simple, three-component recipe (chocolate, peppermint, candy), each ingredient plays a critical role in the final flavor and texture.
Ingredients Checklist
Ensure you source the highest quality chocolate you can reasonably afford. This is not the time to skimp, as poor-quality chocolate contains high amounts of wax or stabilizers that can affect both the taste and the crucial “snap” of the finished bark.
- Dark Chocolate Layer:
- 16 ounces (about 2 2/3 cups) good quality Dark Chocolate or Semi-Sweet Chocolate: Use chips, feves, or finely chopped bar chocolate. Choose a cocoa percentage between 55% and 70% for the best flavor balance.
- 1 tablespoon solid Coconut Oil or Vegetable Shortening (optional): This is a highly recommended addition. It helps lower the melting point slightly, resulting in a smoother, more fluid chocolate that spreads thinly and evenly, enhancing the final snap.
- White Chocolate Layer:
- 24 ounces (about 4 cups) good quality White Chocolate: Again, chips, feves, or finely chopped bars. True white chocolate contains cocoa butter, not just vegetable fat. Check the label! Avoid “white baking chips” that don’t list cocoa butter, as they are notoriously difficult to melt smoothly and often taste waxy.
- 1/2 teaspoon pure Peppermint Extract: Crucial Warning: Use pure extract, not essential peppermint oil. Peppermint oil, while strong, contains compounds that will instantly seize (harden and clump) the chocolate upon contact, ruining the entire batch.
- The Crunch Factor:
- 1 1/2 cups crushed Peppermint Candy Canes or Hard Peppermint Candies: This typically equates to about 12 to 15 standard-sized candy canes. For the best visual appeal, use classic red and white candy canes.
Choosing the Best Chocolate for Your Bark
The success of your Peppermint Bark hinges on the chocolate. Understanding the difference between types is essential:
Dark Chocolate Selection (The Base)
The bottom layer sets the stage. A good semi-sweet or dark chocolate provides the richness that prevents the overall candy from being overly sweet. When melting, always use chocolate that is uniform in size (chips or finely chopped pieces) to ensure even melting. If you use the microwave, finely chopped bar chocolate melts faster and more uniformly than large chips.
White Chocolate Selection (The Star)
White chocolate is notoriously finicky. It contains milk solids and high amounts of cocoa butter, making it extremely sensitive to heat. Overheating white chocolate causes it to burn, clump, or seize immediately. For this reason, high-quality white chocolate (those that contain real cocoa butter) are preferred, as they melt smoother and maintain their creamy texture better than lower-grade substitutes. Remember to melt white chocolate slowly and gently.
The Role of Coconut Oil/Shortening
The optional addition of fat (coconut oil or shortening) is an expert trick. It slightly loosens the viscosity of the melted chocolate, making it easier to spread into a thin, uniform layer. For the dark chocolate layer, this ensures you get a thin, crisp shell. For the white layer, it’s not needed, as the white chocolate naturally has a higher fat content from the cocoa butter.
Essential Equipment Checklist
While you don’t need highly specialized tools, having the right gear makes the process of preparing Peppermint Bark infinitely smoother and faster.
- Large Baking Sheet (10×15 inches or similar): Essential for providing a surface large enough to spread the bark thinly.
- Parchment Paper or Silicone Baking Mat: Absolutely mandatory. Do not attempt this recipe without lining the pan. The chocolate will adhere permanently to an unlined sheet. Parchment paper also assists greatly in lifting the finished slab.
- Heavy-Duty Zip-Top Bag: Used for crushing the candy canes safely and minimizing mess. A double bag is recommended to prevent breakage.
- Rolling Pin or Meat Tenderizer: The preferred tool for crushing the peppermint pieces evenly.
- Heat-Proof Bowls (2 large): One for the dark chocolate, one for the white chocolate. Ensure they are completely dry, as even a drop of water can seize the chocolate.
- Rubber Spatula or Offset Knife: Necessary for spreading the chocolate thinly and smoothly on the baking sheet.
- Large, Sharp Kitchen Knife: Used for cutting the finished, chilled bark into pieces.
Before beginning, ensure your workspace is tidy and cool. Chocolate is highly reactive to temperature, so a cool kitchen environment is your friend when making Peppermint Bark.
Step-by-Step Instructions: Crafting Flawless Two-Layer Peppermint Bark
This process is broken down into three critical phases: preparation, melting the dark layer, and assembling the white layer. Speed and precision during the melting stages are key to success.
Phase 1: Preparation and Crushing the Candy
STEP 1: PREPARE THE WORK SURFACE
Line a large baking sheet (approximately 10×15 inches) with parchment paper or a silicone baking mat. It is helpful if the lining extends slightly over the edges of the pan; this acts as a handle later when you lift the finished bark out. Ensure the surface is flat and ready to go before you begin melting any chocolate.
STEP 2: CRUSH THE CANDY CANES
Place the 1 1/2 cups of peppermint candy canes into a heavy-duty zip-top bag. For extra protection against tears, double-bag them. Seal the bag, pressing out as much air as possible.
Using a rolling pin, meat tenderizer, or the bottom of a heavy pan, carefully smash the candies. Aim for a variety of textures you want some fine powder (which helps the candies adhere) and plenty of small to medium-sized crunchy chunks. Avoid turning everything into fine dust. Set the crushed candy aside in a small, dry bowl. We need this ready for immediate sprinkling later.
Pro Tip: If you are looking for other festive, crunchy treats to make this year, check out our popular guide on Candy Cane Cookies!
Phase 2: Mastering the Dark Chocolate Layer
STEP 3: MELT THE DARK CHOCOLATE LAYER
Combine the 16 ounces of dark chocolate and the optional 1 tablespoon of coconut oil or shortening in a large, heat-proof bowl. Melting chocolate requires patience and gentleness.
- Microwave Method (Fastest): Heat the chocolate in 30-second intervals. After each 30 seconds, remove the bowl and stir vigorously. Continue this heating and stirring process until the chocolate is about 80% melted and only a few tiny lumps remain. Remove the bowl from the microwave entirely and continue stirring. The residual heat will melt the remaining lumps, resulting in perfectly smooth, glossy dark chocolate. Never rush this step or you risk burning the chocolate.
- Double Boiler Method (Safest): Fill a saucepan with 1 to 2 inches of water and bring it to a simmer. Place the bowl of chocolate over the saucepan, ensuring the bottom of the bowl does not touch the simmering water. Stir constantly until the chocolate is completely smooth and melted.
STEP 4: SPREAD AND SET THE DARK LAYER
Pour the fluid, melted dark chocolate onto the center of the prepared baking sheet.
Use an offset spatula or the back of a large spoon to spread the chocolate quickly and evenly into a thin layer. You want the layer to be roughly 1/8 to 1/4 inch thick. Work quickly, as the chocolate will begin to set rapidly.
Transfer the baking sheet immediately to the refrigerator. Chill the dark chocolate for approximately 20 to 30 minutes, or until the layer is completely set and firm to the touch. This step is crucial. If the dark layer isn’t firm, the weight of the white chocolate will push it around, causing the layers to mix.
Phase 3: Perfecting the White Chocolate and Assembly
STEP 5: MELT AND FLAVOR THE WHITE CHOCOLATE
Place the 24 ounces of white chocolate into a second clean, completely dry, heat-proof bowl. Remember, white chocolate burns easily, so treat it gently.
Use the microwave method in shorter bursts (15-second intervals only) or use the double boiler method over very low heat. Stir frequently. Once the white chocolate is nearly smooth a few small specks of unmelted chocolate are visible remove it from the heat source.
Stir vigorously until the remaining specks dissolve. Then, stir in the 1/2 teaspoon of pure peppermint extract. Mix until the extract is fully incorporated and the white chocolate is entirely smooth and glossy. Do not add the extract while the chocolate is still over heat, and ensure it is mixed in completely to avoid streaks.
STEP 6: ASSEMBLE AND TOP THE BARK
Retrieve the firm dark chocolate layer from the refrigerator. If condensation has formed, wipe it gently with a paper towel, though this is rare if the chocolate was set properly.
Pour the melted white chocolate over the solidified dark layer. Use your spatula or offset knife to spread the white chocolate evenly over the dark chocolate layer. Work very fast here! The cold dark chocolate will rapidly pull the heat out of the white chocolate, causing it to set quickly. Aim for a smooth, uniform layer.
Immediately and generously sprinkle all of the reserved crushed candy canes over the entire surface of the wet white chocolate. Gently press the peppermint pieces into the white chocolate with the back of a spoon or your fingertips to ensure they are firmly adhered. A light, even press is all that is needed.
STEP 7: CHILL AND BREAK THE PEPPERMINT BARK
Return the baking sheet to the refrigerator and chill for at least 1 to 2 hours, or until both chocolate layers are completely firm and solid. The bark should feel hard and cold throughout.
Remove the bark from the refrigerator. Lift the entire slab off the baking sheet using the parchment paper lining and place it on a stable cutting board. Gently peel the parchment paper away from the bottom.
You can choose your finished shape:
- Use a large, sharp knife to cut the bark into neat squares or rectangles.
- For the classic, rustic look, simply use your hands to break the slab into irregular, bite-sized pieces.
Store the finished Peppermint Bark in an airtight container at cool room temperature for up to 2 weeks, or in the refrigerator for extended freshness. Layer the pieces between sheets of parchment paper if stacking.
Tips, Troubleshooting, and Delicious Peppermint Bark Variations
While this recipe for Peppermint Bark is straightforward, working with chocolate requires a few specialized considerations. Here are essential tips to ensure your candy turns out perfectly, along with fun ways to customize your creation.
Troubleshooting Common Chocolate Mistakes
Preventing the Dreaded “Seize”
Chocolate seizes when even a tiny amount of liquid, such as water or certain flavorings, mixes with the melted cocoa solids. The chocolate instantly turns from a smooth liquid into a stiff, grainy paste.
- Keep it Dry: Ensure all your utensils, bowls, and spatulas are completely dry before they touch the chocolate.
- Use Extract, Not Oil: As emphasized, only use pure peppermint extract, not highly concentrated peppermint oil, which can trigger seizing.
- Steaming Control: If using a double boiler, make absolutely sure the steam does not escape from under the bowl and condense back into the chocolate. Never let the boiling water touch the bottom of the melting bowl.
Avoiding “Blossoming” (White Streaks)
If your chocolate develops white or gray streaks after cooling, it has “bloomed.” This happens when the cocoa butter separates, usually due to rapid temperature changes (like putting hot chocolate immediately into a very cold freezer) or improper melting (overheating).
- Melt Gently: Always melt slowly, especially the white chocolate. Never use high heat.
- Gradual Cooling: Use the refrigerator for chilling, not the freezer, unless absolutely necessary. The freezer cools the cocoa butter too rapidly.
Ensuring the Best Snap
The perfect snap comes from properly set chocolate. If your bark is chewy or soft, it’s often because the layers were spread too thickly.
- Spread Thinly: Aim for 1/8 to 1/4 inch thickness for both layers combined. Thinner chocolate snaps better.
- Use the Fat: Incorporating the coconut oil or shortening in the dark chocolate helps achieve a thinner, crisper layer.
Creative Variations on the Classic Recipe
While the classic dark/white combination is unbeatable, you can easily adapt this recipe to create unique holiday treats.
Alternative Chocolate Layers
- Milk Chocolate Bark: Swap the dark chocolate for milk chocolate. This results in a sweeter, milder flavor profile, ideal for those who find dark chocolate too intense.
- Marbled Bark: Instead of layering, dollop the dark and white chocolate onto the pan simultaneously and use a skewer to gently swirl the colors together before sprinkling the peppermint.
- Single-Layer Bark: Use only white chocolate or only dark chocolate, adding the peppermint extract to that single layer. This speeds up the process and focuses the flavor.
Flavor and Topping Swaps
The fun of bark is the topping! Consider these festive alternatives:
- The Salty Crunch: Before pressing the candy canes, sprinkle the white layer with coarse sea salt or finely crushed pretzels. The sweet-and-salty combination is phenomenal.
- Extract Experiments: Instead of peppermint, try a few drops of pure orange extract for a chocolate-orange bark, or almond extract for a subtle, nutty undertone.
- Gourmet Toppings: Add slivered almonds, crushed pistachios, or a drizzle of melted caramel over the peppermint layer.
Making It Vegan or Dairy-Free Peppermint Bark
It is entirely possible to make a vegan-friendly Peppermint Bark! The challenge lies in the white chocolate layer.
- Dark Chocolate: Most high-quality dark chocolate (70% cocoa or higher) is naturally dairy-free. Always check the label for “milk solids” or cross-contamination warnings if allergies are severe.
- White Chocolate Substitute: Search for quality vegan white chocolate baking bars or disks. These are typically made with cocoa butter and rice milk or oat milk solids. They melt and set similarly to dairy-based white chocolate.
- Crushed Candy: Ensure the candy canes you use are vegan, as some brands use gelatin or other animal products. Most standard major brand candy canes are generally vegan, but check the ingredient list to be sure.
For more baking inspiration, including decadent holiday ideas like our classic Cranberry Bliss Bars, visit our Pinterest board for seasonal favorites: See More Recipes Pinterest.
Understanding the Sweetness: Nutritional Snapshot and Benefits
Peppermint Bark is undeniably a treat a delightful indulgence that should be enjoyed in moderation during the festive season. Providing precise nutritional information for homemade bark is challenging because the final piece sizes vary significantly, but we can provide a general snapshot based on the ingredients used.
General Nutritional Estimates (Per 1-ounce serving, approximate)
When calculating for a standard recipe yielding approximately 40 servings (1 ounce each):
| Nutrient | Approximate Value |
|---|---|
| Calories | ~150 – 180 kcal |
| Total Fat | ~10g – 12g |
| Saturated Fat | ~6g – 7g |
| Carbohydrates | ~18g – 22g |
| Sugar (added & natural) | ~15g – 18g |
| Protein | ~1g – 2g |
| Fiber | ~1g |
Note: These values are estimates and rely heavily on the type and brand of chocolate used (e.g., higher quality dark chocolate may contain more cocoa butter/fat and slightly less sugar than a semi-sweet chip). The candy cane portion contributes primarily to the carbohydrate/sugar count.
The Benefits of Choosing High-Quality Dark Chocolate
While Peppermint Bark is a dessert, the quality of the dark chocolate base does provide some inherent benefits:
- Antioxidants: Good quality dark chocolate (55% cocoa or higher) is loaded with powerful antioxidants, including flavonoids, which can help fight cell damage. The higher the cocoa content, the higher the antioxidant concentration.
- Mineral Content: Dark chocolate contains beneficial minerals such as iron, magnesium, copper, and manganese.
- Heart Health: Studies suggest that the flavonoids in dark chocolate may help support blood flow and lower blood pressure, contributing to overall cardiovascular health when consumed in moderation.
Considerations for White Chocolate
White chocolate, by definition, contains no cocoa solids, meaning it does not carry the antioxidant benefits of dark chocolate. It is essentially a blend of cocoa butter, milk solids, and sugar. However, using high-quality white chocolate (one that uses real cocoa butter) ensures a smoother texture and better overall flavor, which is key to enjoying this rich holiday sweet.
The important takeaway is that homemade Peppermint Bark allows you to control the quality of the fats and sugars you consume during the holidays. By choosing premium chocolate, you ensure that your seasonal indulgence is as flavorful and beneficial (in small doses) as possible.
FAQs About Peppermint Bark
Do you have questions about storage, shelf life, or making the best possible batch of Peppermint Bark? Here are answers to some of the most common inquiries, often found in ‘People Also Ask’ sections related to this holiday favorite.
How long does homemade Peppermint Bark last?
When stored in a dry, cool environment in an airtight container, homemade Peppermint Bark can last up to 2 weeks at room temperature. For longer storage, you can keep it in the refrigerator for 3 to 4 weeks. If you plan to keep it past the one-month mark, freezing the bark is the best option.
Can I freeze Peppermint Bark?
Yes, Peppermint Bark freezes very well. Wrap the broken pieces tightly in freezer-safe plastic wrap or foil, then place them inside an airtight container. When you are ready to serve, thaw the container overnight in the refrigerator, and then let it come to room temperature before opening the container to prevent condensation.
Why did my white chocolate seize or become grainy?
White chocolate is highly sensitive to heat and moisture. Seizing (turning grainy or stiff) occurs because it was either overheated (burned), or because a tiny drop of water or steam mixed into the cocoa butter. Always melt white chocolate slowly, using low heat, and ensure all utensils are perfectly dry.
Is tempering necessary for homemade Peppermint Bark?
While true tempering (the precise process of heating and cooling chocolate to stabilize its crystal structure) guarantees the absolute best shine and snap, it is not strictly necessary for simple bark recipes, especially if you use the shortening/coconut oil trick. As long as you melt the chocolate gently and don’t overheat it, you will still achieve a great, snappy result.
What is the best way to crush the candy canes for Peppermint Bark?
The easiest and tidiest method is placing the candy canes in a heavy-duty zip-top bag and gently crushing them with a rolling pin or meat tenderizer. Avoid creating only fine powder; you want a variety of sizes, from fine dust (for adhesion) to larger, crunchy pieces for texture in the final Peppermint Bark.
How do I prevent the layers from separating when I break the bark?
Layer separation usually happens if the first layer of dark chocolate wasn’t completely set, or if the second layer of white chocolate was too hot when applied. Ensure the dark chocolate is hard and cold before pouring the warm white chocolate over it. The temperature shock helps the layers bond firmly as the whole piece sets in the refrigerator.
Conclusion: The Perfect Holiday Confection
The journey to creating the perfect Peppermint Bark is a simple, satisfying one. This recipe provides not only the necessary steps but the crucial insights into handling chocolate especially the sensitive white chocolate ensuring that every batch you make results in those coveted crisp, glossy layers and the refreshing burst of minty flavor. We’ve covered everything from selecting the superior quality chocolate that provides depth to the rich base layer, to the easy melting techniques that avoid the dreaded grainy texture.
Whether you’re looking for a quick, impressive dessert, a fun activity to share with family, or the ideal gift for friends and neighbors, homemade Peppermint Bark ticks every box. Its stunning visual appeal, combined with the classic combination of dark chocolate, smooth white chocolate, and crunchy candy cane, makes it an undisputed king of holiday sweets.
This holiday season, skip the expensive, commercial versions. Embrace the ease and superior flavor of homemade. Take these instructions, grab your ingredients, and make a batch of this magnificent Peppermint Bark. You will be amazed at how quickly this confection comes together and how much joy it brings. Don’t forget to share your finished creations with us! We love seeing your holiday masterpieces.
If you enjoyed this recipe, please consider trying other festive treats like our Candy Cane Cookies or our Christmas Oreo Balls. Happy cracking and happy holidays!
Classic Homemade Peppermint Bark
Ingredients
Equipment
Method
- Line a large baking sheet (approximately 10x15 inches or a similar size) with parchment paper or a silicone baking mat. Ensure the lining extends over the sides to make removing the finished bark easier. Set the prepared pan aside.
- Place the peppermint candy canes into a heavy-duty zip-top bag. Seal the bag, pressing out as much air as possible. Using a rolling pin, a meat tenderizer, or the bottom of a heavy pan, carefully smash the candies until they are crushed into a mixture of small and medium-sized pieces. Set the crushed candy aside in a small bowl.
- Combine the dark chocolate and the optional coconut oil or shortening in a large, heat-proof bowl. Melt the chocolate using the microwave (30-second intervals, stirring well) or the double boiler method until completely smooth.
- Pour the melted dark chocolate onto the center of the prepared baking sheet. Use a spatula or offset knife to spread the chocolate evenly into a thin layer (approximately 1/8 to 1/4 inch thick). Transfer the baking sheet to the refrigerator and chill for 20 to 30 minutes, or until the layer is completely set and firm to the touch.
- Place the white chocolate into a clean, dry, heat-proof bowl. Melt the white chocolate using the microwave (15-second intervals) or double boiler over very low heat. Once the white chocolate is nearly smooth, remove it from the heat source and stir in the 1/2 teaspoon of peppermint extract until the mixture is fully incorporated and smooth.
- Pour the melted white chocolate over the solidified dark chocolate layer. Quickly use a spatula or offset knife to spread the white chocolate evenly over the dark chocolate. Immediately and generously sprinkle the reserved crushed candy canes over the top of the wet white chocolate layer. Gently press the peppermint pieces into the white chocolate with the back of a spoon or your fingertips to ensure they adhere firmly.
- Return the baking sheet to the refrigerator and chill for at least 1 to 2 hours, or until both layers of the peppermint bark are completely firm and solid.
- Remove the bark from the refrigerator. Lift the entire slab of bark off the baking sheet using the parchment paper lining. Place the bark on a cutting board, peel the parchment paper away, and use your hands to break the chocolate slab into irregular, bite-sized pieces or use a large, sharp knife to cut it into neat squares.


