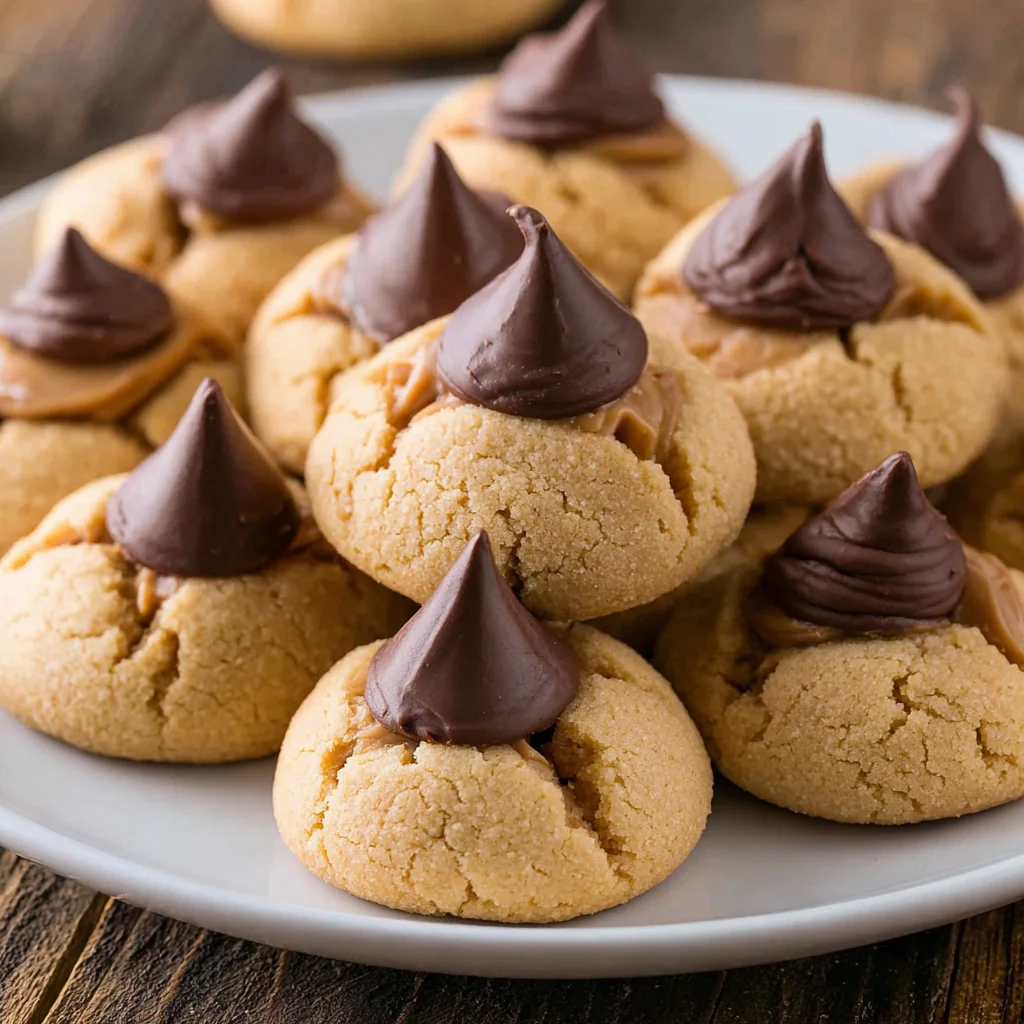
There are few cookies that evoke the sense of cozy nostalgia quite like the Peanut Butter Blossom. With its chewy, soft peanut butter base, rolled lovingly in sparkling sugar, and crowned with that iconic, melt-in-your-mouth milk chocolate candy kiss, the Perfect Peanut Butter Blossoms stand as a monument to simple, comforting American baking. These cookies are not just a treat; they are a tradition a staple on holiday trays, in school lunchboxes, and at every potluck imaginable.
If you have ever found yourself yearning for that delicate balance between salty, sweet, and unbelievably tender, then you have come to the right place. This recipe is dedicated to perfecting the blossom ensuring your cookies have the ideal soft center, those signature crinkled edges, and a chocolate topping that adheres beautifully without melting into a gooey mess. Forget dry, crumbly dough; we are elevating this classic to its peak performance. Get ready to bake the absolute best, most truly Perfect Peanut Butter Blossoms you have ever tasted.
Why You’ll Fall Head Over Heels for These Perfect Peanut Butter Blossoms
The ubiquity of the peanut butter blossom is no accident; it is a testament to its pure, irresistible flavor profile. However, achieving perfection is an exercise in balancing texture and taste, and this specific formula delivers on every front. You will fall head over heels for these cookies for several compelling reasons that go far beyond mere nostalgia.
Firstly, the texture is paramount. Many traditional peanut butter cookies can lean toward the dry side, but our recipe utilizes a specific ratio of butter and brown sugar that guarantees a chewy, moist interior that practically melts in your mouth. The combination of both granulated sugar and packed light brown sugar serves a dual purpose: the granulated sugar helps the cookies spread perfectly and adds structure, while the brown sugar introduces moisture and that signature caramel-like depth, leading to truly soft and decadent Perfect Peanut Butter Blossoms.
Secondly, the visual appeal is unmatched. Rolling the dough in extra granulated sugar before baking provides a beautiful sparkle and creates those characteristic crackled edges when the warm chocolate kiss is pressed down. This signature crack is not just aesthetic; it’s a tactile indication of a successful bake a cookie that is perfectly soft and ready to receive its crown. If you are looking for other stunning holiday treats, you might also want to check out my recipe for Christmas Thumbprint Cookies, which offers a similar festive appeal.
Thirdly, these cookies are incredibly easy to scale. Whether you need a small batch for a weeknight craving or enough cookies to feed a crowd during the festive season, the ingredients are simple, affordable, and readily available. This makes the recipe ideal for seasoned bakers and novices alike. Furthermore, the dough freezes beautifully, allowing you to prepare ahead of time and bake fresh whenever the craving strikes. This flexibility is what makes the Perfect Peanut Butter Blossoms a fundamental part of the home baker’s repertoire.
Finally, the flavor combination salty peanut butter embraced by sweet, smooth milk chocolate is an undeniable classic. It hits every flavor note necessary for absolute satisfaction. Unlike other cookies that rely on complicated fillings or delicate decorations, the beauty of the peanut butter blossom lies in its straightforward deliciousness. They travel well, stack beautifully, and are always the first item to disappear from the dessert table. These are more than just cookies; they are edible comfort.
The Art of Baking: Why You Should Try This Recipe for Soft Peanut Butter Blossoms
If you’ve attempted peanut butter blossoms before only to end up with cookies that were too stiff, too flat, or kisses that melted into puddles, this recipe provides the precise framework needed for guaranteed success. This particular formulation focuses heavily on optimizing texture, yielding the ultimate soft peanut butter blossoms.
The secret lies in the careful preparation and measurement of the fats and flours. We emphasize using softened, room-temperature butter and the correct creaming method. When butter, granulated sugar, and brown sugar are creamed properly a process that introduces air and lightens the mixture it sets the foundation for a tender crumb. Rushing this step often results in dense cookies. We aim for a light, almost airy texture before adding the heavier peanut butter and dry ingredients.
Moreover, the absence of added leavening agents beyond baking soda in this recipe is intentional. Baking soda reacts with the brown sugar and the slight acidity of the peanut butter to provide the perfect lift and spread. We avoid baking powder, which can sometimes lead to an overly cakey texture, prioritizing that wonderfully chewy spread. For those who love the chewy texture of peanut butter in every form, learning how to achieve that perfect softness is essential, similar to mastering other peanut butter desserts like my guide on Soft Peanut Butter Cookies.
Another crucial differentiator in this approach is the temperature management of the ingredients. The butter must be softened not melted to cream effectively. Similarly, the egg acts as a binder; using a large egg at room temperature ensures it emulsifies smoothly into the fat mixture, preventing the dough from separating or becoming oily. This smooth, cohesive dough is the key to perfectly uniform cookie balls that hold their shape and resist excessive spreading during the initial bake. This attention to detail transforms an average cookie into the Perfect Peanut Butter Blossoms.
Finally, we address the most common challenge: the chocolate kiss. The timing of pressing the chocolate into the hot cookie is critical. Placing the kiss immediately after removing the sheet from the oven means the residual heat softens the chocolate just enough to adhere, without causing it to collapse or melt completely. This immediate action also generates those appealing small cracks around the perimeter of the cookie, confirming that the cookie is tender and baked through. Following these precise steps ensures that every single cookie is structurally sound, visually beautiful, and tastes exactly like the classic, comforting treat it’s meant to be.
Ingredients and Essential Tools for Achieving Perfect Peanut Butter Blossoms
Success in baking, especially with a recipe as iconic as the Perfect Peanut Butter Blossoms, starts with precise measurements and quality ingredients. We will break down exactly what you need and why each component is vital to the final, delicious outcome.
Ingredients Breakdown:
For the Cookies:
- 1/2 cup (1 stick) unsalted butter, softened: Butter must be at room temperature, but still firm enough to hold a light indentation. Using unsalted butter allows you to control the total sodium content. The richness of the butter is central to the cookie’s flavor and soft texture.
- 1/2 cup granulated sugar: Provides necessary structure and contributes to the crispness around the edges.
- 1/2 cup packed light brown sugar: Crucial for adding moisture, depth of flavor (molasses), and contributing to the desirable chewy texture. Ensure it is firmly packed into the measuring cup for accuracy.
- 1/2 cup creamy peanut butter: We strongly recommend using conventional, processed creamy peanut butter (like Jif or Skippy), as natural peanut butter (which separates) can alter the fat and moisture ratio significantly, leading to a drier or oilier cookie. Ensure it is smooth and not chunky for the creamiest dough texture.
- 1 large egg: The binder that holds the fats and flours together. Use at room temperature for optimal emulsification.
- 1 teaspoon vanilla extract: A flavor enhancer that complements the peanut butter and chocolate beautifully. Use pure vanilla extract for the best flavor.
- 1 3/4 cups all-purpose flour: Standard all-purpose flour works perfectly. Ensure you measure using the spoon-and-level method (spoon flour into the cup and level off with a knife) to avoid over-packing, which can result in dense, dry cookies.
- 1 teaspoon baking soda: This leavening agent provides the necessary lift and spread. Do not confuse it with baking powder.
- 1/2 teaspoon salt: Essential for balancing the sweetness and enhancing the deep, nutty flavor of the peanut butter.
For Rolling and Garnish:
- 1/4 cup granulated sugar (for rolling): Used to coat the dough balls, giving the cookies a beautiful sparkle, a slightly crunchy exterior, and helping to achieve the characteristic cracked pattern upon baking.
- Approximately 48 milk chocolate candy kisses, unwrapped: While 48 is the standard yield, having a few extra on hand is always wise. It is essential that these are unwrapped before the cookies come out of the oven, as timing is critical. Milk chocolate is traditional, but you can explore variations.
Kitchen Tools for Perfect Cookie Success
While Perfect Peanut Butter Blossoms are straightforward, using the right tools ensures uniformity and ease, making the baking process far more enjoyable. Consistency is key when aiming for bakery-quality results.
- Electric Mixer (Stand Mixer or Handheld): Essential for the creaming process (Step 2). A stand mixer with the paddle attachment makes the job effortless, ensuring the butter and sugars are perfectly aerated.
- Large Mixing Bowl and Medium Mixing Bowl: You will need a large bowl for the wet ingredients and a separate medium bowl for whisking the dry ingredients.
- Rubber Spatula/Scraper: Crucial for scraping down the sides of the bowl during mixing to ensure all ingredients are fully incorporated and the dough is homogeneous.
- Cookie Scoop (1-inch or 1-tablespoon size): This is arguably the most important tool for achieving uniformity. Using a scoop ensures every cookie is the same size, leading to even baking times. Consistent size is paramount for that professional-looking batch of Perfect Peanut Butter Blossoms.
- Baking Sheets: At least two large, light-colored baking sheets are needed. Light-colored sheets prevent the bottoms of the cookies from browning too quickly.
- Parchment Paper or Silicone Baking Mats: Absolutely necessary! These prevent sticking, promote even heat distribution, and make cleanup a breeze. Never place these soft cookies directly onto an unlined pan.
- Wire Cooling Rack: Needed for the final cooling stage. Proper air circulation ensures the bottoms don’t steam, which can make the cookies soggy.
- Measuring Cups and Spoons (Dry and Liquid): Accuracy in measuring ingredients like flour, sugar, and baking soda is non-negotiable for the successful execution of this recipe.
Investing in tools like a reliable cookie scoop, as mentioned above, dramatically improves the presentation of any baked goods. Whether you are making these blossoms or whipping up a batch of Fudgy Chocolate Brownie Cookies, uniform scooping is the difference between a good cookie and a great one.
Step-by-Step Instructions to Create the Ultimate Chocolate Kiss Cookies
Baking the ultimate chocolate kiss cookies is a straightforward process when approached methodically. Follow these detailed steps to guarantee a batch of truly Perfect Peanut Butter Blossoms.
1. Prepare the Oven and Baking Sheets
- Preheat your oven to 375°F (190°C). Precise oven temperature is vital for the correct spread and texture.
- Line two large baking sheets with parchment paper or silicone baking mats. This ensures the cookies do not stick and cook evenly.
- Crucial Prep Step: Unwrap all approximately 48 milk chocolate candy kisses and set them aside. Trying to unwrap these while the cookies are hot is a race against the clock and can lead to uneven results.
2. Combine Wet Ingredients and Sugars (The Creaming Stage)
- In a large mixing bowl, combine the softened butter, 1/2 cup granulated sugar, and light brown sugar.
- Using an electric mixer (handheld or stand mixer with the paddle attachment), cream these ingredients together on medium speed.
- Mix until the mixture is light, fluffy, and noticeably paler in color this usually takes about 2 to 3 minutes. Stop and scrape down the sides of the bowl often. This step incorporates air, which contributes to the soft texture of the finished Perfect Peanut Butter Blossoms.
3. Incorporate Peanut Butter and Flavoring
- Reduce the mixer speed to low and add the 1/2 cup creamy peanut butter. Beat until it is fully combined, scraping the bowl once more to ensure no pockets of butter or sugar remain.
- Add the large egg and vanilla extract. Mix until they are just blended. Do not overmix at this stage; mix only until the yellow streak of the egg disappears. Overmixing the egg can start to develop the gluten too early.
4. Combine Dry Ingredients
- In a separate medium bowl, whisk together the all-purpose flour, baking soda, and salt. Whisking ensures the leavening agent and salt are evenly dispersed throughout the flour, which is essential for consistent lift in every cookie.
5. Mix Dough (The Final Incorporation)
- Gradually add the dry ingredient mixture to the wet mixture. It is best to do this in three stages.
- Mix on the lowest speed possible. Continue mixing only until the dough comes together and no streaks of flour remain.
- Stop the Mixer Immediately: The moment the flour is incorporated, stop mixing. Overmixing develops gluten, which results in tough, less tender Peanut Butter Blossoms. The dough should be soft, slightly crumbly, but hold its shape when pressed.
6. Prepare Rolling Station and Scoop
- Pour the reserved 1/4 cup of granulated sugar into a small, shallow dish for rolling.
- Scoop the cookie dough using a small cookie scoop (about 1 tablespoon or 1 inch in diameter). Uniform size is crucial for even baking. If you don’t have a scoop, roll the dough firmly into balls of uniform size.
7. Coat with Sugar and Arrange
- Roll each dough ball thoroughly in the dish of granulated sugar to coat all sides completely. This sugary coating is key to the cookie’s appearance and crunch.
- Place the sugared dough balls onto the prepared baking sheets, spacing them about 2 inches apart to allow for proper spreading.
8. Initial Bake
- Bake the cookies for 8 to 10 minutes.
- The cookies are done when they are lightly golden brown, the edges appear set, but the center still looks slightly soft or puffed. Slight underbaking is preferred, as the cookie will finish cooking on the hot sheet.
9. Add Chocolate Kisses
- This is the most time-sensitive step. Immediately upon removing the cookies from the oven, gently but firmly press one unwrapped chocolate kiss into the center of each hot cookie.
- The pressure should cause the cookie to crack slightly around the edges, confirming that the cookie is perfectly soft. Do this quickly before the cookies cool.
10. Cool Completely
- Allow the cookies to cool on the baking sheet for 5 minutes. During this time, the residual heat will melt the base of the chocolate kiss enough for it to adhere firmly.
- Carefully transfer the cookies to a wire rack to cool completely. The chocolate kisses will be extremely soft and meltable.
- Important: Do not touch, move, or stack the cookies until the chocolate has fully set, which may take up to an hour at room temperature or 20–30 minutes in a cool place (like a refrigerator). Once the chocolate is fully set, your batch of Perfect Peanut Butter Blossoms is ready to enjoy!
Tips, Troubleshooting, and Creative Variations for Perfect Peanut Butter Blossoms
Mastering the Perfect Peanut Butter Blossoms means understanding how to troubleshoot common issues and knowing when and how to experiment with variations. Here are the professional tips you need to elevate your baking game.
Troubleshooting Common Mistakes:
1. My cookies are too crumbly/dry.
This is often caused by measuring too much flour (using a measuring cup directly in the flour bag) or overmixing the dough after the flour has been added. Tip: Always use the spoon-and-level method for flour. If your dough still seems dry, add a teaspoon of milk or cream until the dough holds together better.
2. My cookies spread too much.
Excessive spreading is usually due to butter being too warm or melted, or measuring too little flour. Tip: If the dough feels overly soft or greasy after mixing, chill it in the refrigerator for 20-30 minutes before scooping and rolling. Also, ensure your baking soda is fresh.
3. My chocolate kiss melted into a puddle.
This happens if the kiss is pressed too late (the heat has dissipated) or if the chocolate used is too old or sensitive. Tip: Press the kisses immediately upon oven removal. If your kitchen is very warm, try placing the fully baked and topped cookies in the refrigerator for 10 minutes after the initial 5-minute cool-down period to set the chocolate quickly.
Tips for Maximum Flavor and Texture:
- Room Temperature Ingredients: Ensure butter and eggs are at true room temperature. This is essential for achieving a uniform, fluffy batter during the creaming stage.
- Don’t Skip the Sugar Roll: The sugar coating isn’t just for looks; it helps regulate how much the cookie spreads and creates a slightly crisp shell that protects the soft interior.
- Bake Time is Everything: Watch for the edges to be set, but the center to still look slightly pale. When in doubt, err on the side of slightly underbaked for maximum chewiness.
Creative Variations:
While the classic milk chocolate kiss is sacred, you can easily adapt this recipe to suit different tastes or dietary needs.
- Chocolate Alternatives: Instead of milk chocolate kisses, use dark chocolate squares, white chocolate peppermint kisses for a holiday twist, or even a small peanut butter cup (add immediately after baking).
- Gluten-Free Blossoms: Substitute the all-purpose flour with a high-quality 1:1 gluten-free baking blend that contains xanthan gum. You may need to slightly decrease the liquid or chill the dough longer, as GF blends absorb moisture differently.
- Nutty Texture: If you absolutely prefer chunky peanut butter, substitute half of the creamy peanut butter with chunky. Be aware this will slightly change the density and texture of the cookie, making it heartier.
- Spice it Up: Add 1/2 teaspoon of cinnamon to the dry ingredients for a subtle warmth that pairs beautifully with the peanut butter base.
- Holiday Flair: Before rolling the dough balls in the sugar, try rolling them in holiday-themed sprinkles (red/green) for an extra festive presentation. This works perfectly when preparing a large batch for a winter party.
For more inspiration on unique baking ideas and seasonal treats, be sure to follow my recipe collection on Pinterest, where I share dozens of sweet treat ideas.
Nutritional Snapshot and Ingredient Benefits of these Classic Peanut Butter Blossom Treats
When indulging in a classic dessert like the Perfect Peanut Butter Blossoms, it is helpful to understand the nutritional contribution of the key components. While these are certainly a treat and best enjoyed in moderation, peanut butter does offer surprising benefits compared to other fats used in baking.
Estimated Nutritional Values (Per Cookie, based on 48 servings):
Note: These values are approximations and depend heavily on the exact brand of peanut butter and chocolate kiss used.
- Calories: 100 – 120 kcal
- Total Fat: 5 – 7 g
- Saturated Fat: 2.5 – 3.5 g
- Carbohydrates: 12 – 15 g
- Sugar: 8 – 10 g
- Protein: 2 – 3 g
As expected from a classic cookie, the primary sources of energy are carbohydrates and fats. However, the presence of peanut butter significantly alters the nutritional profile compared to a standard sugar cookie.
The Benefits of the Peanut Butter Base
Peanut butter, the star ingredient in these Perfect Peanut Butter Blossoms, offers more than just flavor. Peanuts are a nutritional powerhouse, providing essential micronutrients and a satisfying amount of macronutrients.
- Source of Protein: Peanuts are rich in plant-based protein, which contributes to satiety. Although the amount per cookie is small, it’s a better protein count than most other flour-based cookies.
- Healthy Fats: Peanut butter contains monounsaturated and polyunsaturated fats, which are known to be heart-healthy. These fats are what give the cookies their rich, moist texture and satisfying mouthfeel.
- Vitamins and Minerals: Peanuts contain Vitamin E, B vitamins (niacin and folate), magnesium, and phosphorus. Magnesium, in particular, is essential for muscle and nerve function.
- Energy: The combination of sugars and fats provides a quick energy source, making these cookies a perfect mid-day pick-me-up or a satisfying end to a meal.
While the sugar and butter content means these should remain an occasional indulgence, the inclusion of protein-rich peanut butter gives these blossoms a slight edge in nutritional value. When considering baking substitutes, remember that if you swap out the traditional creamy peanut butter for natural peanut butter, you increase the healthy fat content but must adjust the flour slightly due to the oil separation in natural varieties.
Frequently Asked Questions (FAQ) about Perfect Peanut Butter Blossoms
How do you stop Peanut Butter Blossoms from spreading too flat?
To prevent excessive spreading, ensure your butter is softened but not melted. If your kitchen is very warm, chilling the prepared dough balls for 30 minutes before rolling in sugar and baking can help the fat solidify, allowing them to hold their shape better in the oven. Also, verify that you are using the precise amount of flour listed in the recipe.
Can I use crunchy peanut butter for Perfect Peanut Butter Blossoms?
While creamy peanut butter is traditionally recommended for the ideal, soft texture, you can substitute chunky peanut butter if preferred. Be aware that the pieces of peanuts will absorb some moisture, potentially resulting in a slightly drier dough. If using chunky, ensure the brand is standard (not natural separating peanut butter).
What is the best way to store Perfect Peanut Butter Blossoms?
Once the chocolate kisses have fully set and hardened, store the cookies in an airtight container at room temperature. They will keep well for 5 to 7 days. If stacking them, use a sheet of parchment paper between layers to protect the chocolate from sticking or melting, especially in warmer environments.
Do I need to chill the dough for this Peanut Butter Blossom recipe?
No, this specific recipe is formulated to be baked immediately without chilling, saving significant time. The precise measurements of butter and sugar ensure that the dough holds its shape well enough to scoop and roll right away. However, if your kitchen is excessively hot, a quick chill of 15 minutes can prevent greasiness.
How long does it take for the chocolate kisses to set on the cookies?
After pressing the chocolate kisses into the hot cookies, they will take 30 minutes to one hour to fully set at room temperature. The chocolate needs to harden completely before the cookies are moved or stacked. If you are in a rush, you can move the cookies to the refrigerator after the initial 5-minute cool-down on the pan, which will speed up the setting process.
Conclusion: Making Memories with Perfect Peanut Butter Blossoms
The journey to creating truly Perfect Peanut Butter Blossoms is a rewarding one, resulting in a cookie that is greater than the sum of its parts. This recipe elevates the classic peanut butter cookie experience, offering a foolproof guide to achieving that coveted balance of a wonderfully chewy texture, sparkling sugar crust, and a crowning jewel of creamy milk chocolate.
We have covered every crucial step: from the importance of creaming the softened butter and sugars to create a light base, to the essential timing required when pressing the chocolate kisses into the hot, just-baked dough. Remember that attention to detail, such as using a cookie scoop for uniformity and unwrapping those kisses ahead of time, makes all the difference between a good cookie and a perfect one.
These cookies are more than just a dessert; they are a tradition. They are the flavor of childhood, holidays, and cozy gatherings. Whether you are baking them for a school bake sale, a holiday cookie swap, or simply satisfying a deep, comforting craving, these Perfect Peanut Butter Blossoms are guaranteed to bring smiles and warm memories to anyone who enjoys them.
Now that you have the ultimate blueprint, it’s time to preheat that oven and get baking! If you try this recipe, please let me know how they turned out in the comments below. We love hearing about your baking successes! Share this recipe with your friends and family so they too can experience the joy of the truly perfect peanut butter blossom.
PERFECT PEANUT BUTTER BLOSSOMS
Ingredients
Equipment
Method
- Preheat your oven to 375°F (190°C). Line two large baking sheets with parchment paper or silicone baking mats. Unwrap all of the chocolate kisses and set them aside.
- Combine Wet Ingredients and Sugars: In a large mixing bowl, using an electric mixer, cream together the softened butter, 1/2 cup granulated sugar, and light brown sugar until the mixture is light and fluffy, about 2 to 3 minutes.
- Incorporate Peanut Butter and Flavoring: Beat in the peanut butter until fully combined. Add the egg and vanilla extract and mix until just blended, scraping down the sides of the bowl as needed.
- Combine Dry Ingredients: In a separate medium bowl, whisk together the all-purpose flour, baking soda, and salt.
- Mix Dough: Gradually add the dry ingredient mixture to the wet mixture, mixing on low speed until the dough comes together and no streaks of flour remain. Be careful not to overmix the dough.
- Prepare Rolling Station: Pour the reserved 1/4 cup of granulated sugar into a small, shallow dish for rolling the cookie dough.
- Scoop and Roll: Scoop the cookie dough using a small cookie scoop (about 1 tablespoon) or roll the dough into uniform balls, approximately 1 inch in diameter. Roll each dough ball thoroughly in the dish of granulated sugar to coat all sides completely.
- Arrange and Bake: Place the sugared dough balls onto the prepared baking sheets, spacing them about 2 inches apart. Bake the cookies for 8 to 10 minutes. The cookies should be lightly golden brown and appear set, but they should still look slightly soft in the center.
- Add Chocolate Kisses: Immediately upon removing the cookies from the oven, gently press one unwrapped chocolate kiss firmly into the center of each hot cookie. The pressure should cause the cookie to crack slightly around the edges.
- Cool Completely: Allow the cookies to cool on the baking sheet for 5 minutes before carefully transferring them to a wire rack to cool completely. The chocolate kisses will be soft and meltable; do not touch or move them until the chocolate has fully set, which may take up to an hour at room temperature.


