Get ready to dig into these frightfully fun Halloween Dirt Cups! This no-bake dessert is incredibly easy to make, requires minimal ingredients, and is guaranteed to be a huge hit with kids and adults alike. Forget complicated Halloween baking; these dirt cups are the perfect spooky treat for your Halloween party, a classroom celebration, or a fun family night. The combination of crunchy cookie crumbs, creamy cream cheese frosting, and rich chocolate pudding creates a delicious textural experience, while the gummy worms and plastic spiders add a playful, creepy touch that perfectly captures the Halloween spirit. Imagine the delighted screams (of joy, of course!) as your guests uncover this surprisingly delightful dessert. This recipe is incredibly versatile, allowing for customization to suit your preferences and dietary needs. Whether you’re looking for a quick and easy dessert or something more elaborate, these Halloween Dirt Cups are the perfect choice for your spooky celebration.
Why You’ll Love This Halloween Dirt Cups Recipe
These Halloween Dirt Cups are more than just a delicious dessert; they’re a complete Halloween experience! What’s not to love? First and foremost, the ease of preparation is unparalleled. No oven is required, eliminating the need for preheating, baking time, and oven cleanup. This makes them the perfect last-minute dessert, ideal when you’re short on time but still want to impress your guests. The recipe is incredibly forgiving; slight variations in measurements won’t significantly impact the final product.
Secondly, the customization options are endless! Feel free to experiment with different types of cookies, pudding flavors, or even add other Halloween-themed candies. Want a richer chocolate flavor? Use dark chocolate cookies. Prefer a fruity twist? Swap the chocolate pudding for a vanilla pudding and add some colorful candy sprinkles. The possibilities are as limitless as your imagination. The fun lies in creating your own unique and delicious Halloween Dirt Cups. You can even get the kids involved in the decorating process – it’s a great way to spend quality time together while crafting a delicious spooky treat!
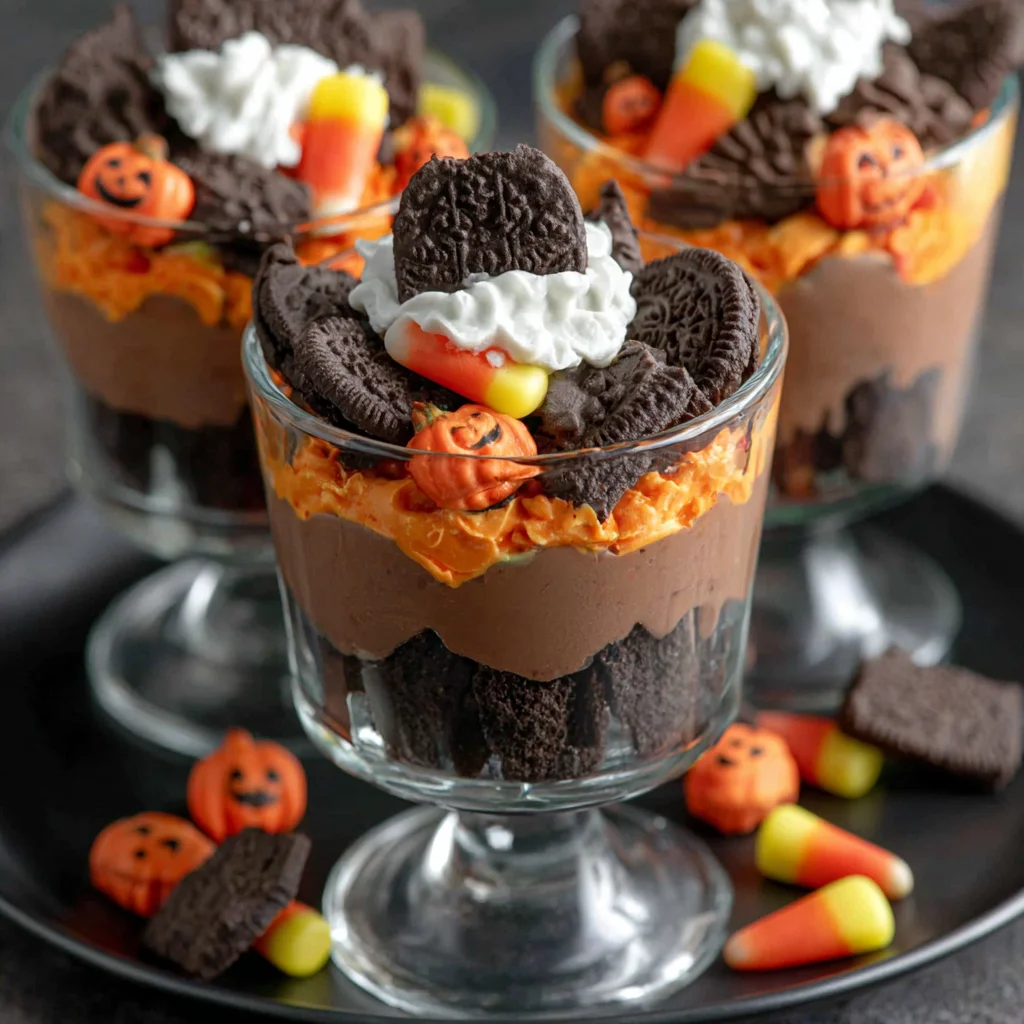
Finally, the presentation is simply delightful. The “dirt” layer, made from crushed chocolate sandwich cookies, instantly creates a visually appealing and thematic dessert. The vibrant gummy worms wriggling out of the “soil” add a playful, spooky touch that’s sure to elicit smiles and laughter. These Halloween Dirt Cups are undeniably cute and perfect for capturing those Instagram-worthy Halloween shots. They’re undeniably perfect for both a casual gathering or a more elaborate Halloween party – guaranteed to add a fun and delicious touch to your celebration.
Why You Should Try This Halloween Dirt Cups Recipe
Beyond the ease and deliciousness, making these Halloween Dirt Cups offers a unique opportunity for creativity and family bonding. It’s a fantastic recipe for engaging children in the kitchen. They can help crush the cookies, layer the ingredients, and of course, have a blast decorating with gummy worms and spiders. This shared activity transforms dessert preparation into a fun and memorable experience, creating lasting Halloween memories. Plus, it’s a great way to introduce children to basic cooking concepts like layering and measuring.
Furthermore, the versatility of this recipe extends beyond the simple substitutions. You can easily adapt it to various dietary needs. Looking for a gluten-free option? Use gluten-free chocolate sandwich cookies. Want a vegan version? Use vegan butter, cream cheese, and pudding. The base recipe is adaptable enough to accommodate almost any dietary restriction. This ensures everyone at your Halloween gathering can enjoy this spooky delight. The flexibility to cater to different tastes makes this the ideal Halloween treat for everyone.
Finally, these Halloween Dirt Cups are a cost-effective dessert option. The ingredients are readily available and relatively inexpensive, making them a budget-friendly choice for larger gatherings. They are also incredibly portable and easy to transport, making them a perfect choice for potlucks, school events, or taking along to a friend’s Halloween party. In essence, this simple recipe delivers a big flavor impact without the hefty price tag of more elaborate desserts.
Ingredients and Necessary Utensils for Halloween Dirt Cups
Creating these hauntingly delicious Halloween Dirt Cups requires a minimal ingredient list and everyday kitchen tools. The simplicity of the recipe allows even novice bakers to achieve perfectly spooky results. Let’s dive into the specifics:
Detailed List of Ingredients:
- 1 package (16 ounces) chocolate sandwich cookies: The foundation of our “dirt”! Choose your favorite brand. Oreos are a classic choice, but any chocolate sandwich cookie will work. Secondary keyword: Chocolate sandwich cookies
- 1/2 cup (1 stick) unsalted butter, melted: This acts as the binding agent for the cookie crumbs, creating that perfect “dirt” consistency. Secondary keyword: Melted butter
- 1 (8 ounce) package cream cheese, softened: The base of our creamy “frosting” layer. Make sure it’s softened to room temperature for easy blending. Secondary keyword: Softened cream cheese
- 1/2 cup powdered sugar: Sweetens the cream cheese mixture and adds to its smooth texture. Secondary keyword: Powdered sugar
- 1 teaspoon vanilla extract: Enhances the flavor of the cream cheese layer, adding a touch of warmth and sweetness. Secondary keyword: Vanilla extract
- 1 cup chocolate pudding (instant or prepared): The rich and decadent final layer that adds both flavor and visual appeal. Instant pudding is convenient, while prepared pudding adds extra richness. Secondary keyword: Chocolate pudding
- Gummy worms: The star of the spooky show! Provides the perfect creepy-crawly touch. Secondary keyword: Gummy worms
- Plastic spiders (optional): Add an extra layer of spooky fun! Secondary keyword: Plastic spiders
- Chocolate shavings (optional): For an added touch of elegance and chocolatey goodness. Secondary keyword: Chocolate shavings
Recommended Tools and Utensils:
- Food processor or zip-top bag: For easily crushing the chocolate sandwich cookies. A food processor ensures even crumbs, while a zip-top bag works well for a more rustic texture.
- Mixing bowls: At least two, one for the cookie crumbs and one for the cream cheese frosting.
- Spatula or whisk: To mix the ingredients smoothly and evenly.
- Measuring cups and spoons: For precise measurements for optimal flavor and texture. Accuracy is key in baking, even for these no-bake Halloween Dirt Cups!
- Individual serving cups or small glasses: To layer your Halloween Dirt Cups. Clear cups allow the layers to show beautifully. Try using different sizes and shapes to enhance the presentation.
- Spoon or small ice cream scoop: For neatly layering the ingredients into the cups.
- Optional: Piping bag or zip-top bag with a corner snipped off: For creating a more professional-looking cream cheese frosting layer.
Detailed Recipe Steps for Halloween Dirt Cups
Let’s create these spooky delights! Follow these simple steps for perfectly layered, deliciously creepy Halloween Dirt Cups:
- Crush the cookies: Place the chocolate sandwich cookies in a food processor and pulse until finely crushed. Alternatively, place the cookies in a zip-top bag and crush them using a rolling pin. Aim for a consistency that resembles coarse dirt.
- Combine cookie crumbs and melted butter: In a mixing bowl, combine the crushed cookies with the melted butter. Mix thoroughly until the crumbs are evenly moistened. Ensure all crumbs are coated; this prevents dryness.
- Prepare the cream cheese frosting: In a separate bowl, beat the softened cream cheese with an electric mixer until smooth and creamy. Gradually add the powdered sugar and vanilla extract, beating until well combined and fluffy. Don’t overmix; this can lead to a grainy texture.
- Layer the ingredients: Divide the cookie crumbs among your chosen serving cups. Press down gently to create a firm base layer. Next, add a layer of the cream cheese frosting, spreading it evenly over the cookie crumbs. Top with a layer of chocolate pudding.
- Decorate: Add your gummy worms, plastic spiders, and chocolate shavings for a spooky and delightful finish. Get creative! Arrange the gummy worms to look like they’re emerging from the dirt. Place the spiders strategically for maximum impact.
- Chill (optional): For a firmer and more refreshing treat, refrigerate the Halloween Dirt Cups for at least 30 minutes before serving. This allows the layers to settle and the pudding to cool, enhancing the overall experience.
Tips and Variations for Halloween Dirt Cups
Elevate your Halloween Dirt Cups with these helpful tips and exciting variations:
- Cookie variations: Experiment with different types of chocolate cookies, or even try using graham crackers for a different texture and flavor.
- Pudding variations: Use other pudding flavors like vanilla or even pumpkin for a seasonal twist. You could also use chocolate mousse for a richer, more decadent dessert.
- Topping variations: Add other Halloween candies like mini chocolate chips, sprinkles, crushed candy corn, or even chocolate-covered pretzels for added texture and flavor.
- Vegan adaptation: Use vegan butter, vegan cream cheese, and vegan chocolate pudding to create a delicious plant-based version.
- Gluten-free adaptation: Use gluten-free chocolate sandwich cookies to make this recipe suitable for those with gluten sensitivities.
- Avoid overmixing: Overmixing the cream cheese frosting can lead to a grainy texture. Mix only until the ingredients are just combined.
- Don’t over-crush the cookies: While you want fine crumbs, avoid turning them into dust. Some larger pieces add a pleasant texture to the “dirt” layer.
- Presentation matters: Use clear cups to showcase the beautiful layers. A sprinkle of cocoa powder over the top adds to the “dirt” effect.
Nutritional Values and Benefits of Halloween Dirt Cups
While Halloween Dirt Cups are undeniably a treat, it’s beneficial to understand their nutritional content and the benefits of the key ingredients:
A single serving of Halloween Dirt Cups (assuming standard-sized ingredients and proportions) contains approximately:
- Calories: 300-350 (This is an estimate and can vary significantly depending on the specific brands and quantities used)
- Protein: 4-6 grams (primarily from the cream cheese)
- Fat: 15-20 grams (mostly from the butter and cookies)
- Carbohydrates: 35-45 grams (largely from the cookies and pudding)
Please note: This is a general estimate. Accurate nutritional information can vary depending on the specific brands and quantities of ingredients used. Use a nutrition calculator for a precise analysis based on your exact recipe components.
Benefits of Ingredients:
- Chocolate: Contains antioxidants and can boost mood. However, moderation is key.
- Cream Cheese: A good source of calcium and protein.
- Cookies: Provide energy; choose whole-wheat versions for added fiber if adapting the recipe.
- Gummy worms (in moderation): Provide a fun element and a small boost of sugar, but should be enjoyed as a treat only due to high sugar content.
FAQs
Are Halloween Dirt Cups difficult to make?
Can I make Halloween Dirt Cups ahead of time?
What kind of cookies are best for Halloween Dirt Cups?
Can I make vegan Halloween Dirt Cups?
What are some creative ways to decorate Halloween Dirt Cups?
Conclusion
These Halloween Dirt Cups are more than just a delicious dessert; they’re a fun, easy, and customizable treat that’s perfect for any Halloween celebration. With their simple ingredients, no-bake preparation, and endless decorating possibilities, they’re guaranteed to be a hit with everyone. Remember to adapt the recipe to your preferences and dietary needs; the possibilities are truly endless! So, gather your ingredients, get creative, and create some spooky fun in the kitchen. Don’t forget to share your creations with us in the comments below, and tag us on social media if you post pictures of your deliciously spooky Halloween Dirt Cups! For more amazing recipe ideas, check out our other recipes on our blog! For example, our Peanut Butter Oat Balls are another fun and easy treat.
Happy haunting and happy baking!
Spooky Halloween Dirt Cups
Ingredients
Equipment
Method
- Crush chocolate sandwich cookies into fine crumbs. You can use a food processor or place cookies in a zip-top bag and crush with a rolling pin.
- In a mixing bowl, combine the crushed cookies and melted butter. Mix until well combined.
- In a separate bowl, beat together the softened cream cheese, powdered sugar, and vanilla extract until smooth and creamy.
- Layer the cookie crumbs in the bottom of small glasses or cups, pressing down gently to form a base.
- Top with a layer of chocolate pudding.
- Next, add a layer of the cream cheese frosting.
- Decorate with gummy worms, plastic spiders, and chocolate shavings as desired.
- Chill for at least 15 minutes before serving to allow the flavors to meld and the dessert to set slightly.


