The aroma of warm spices and rich eggnog fills the kitchen, promising a comforting treat. This isn’t just any bread; it’s Eggnog Bread, a holiday classic transformed into a moist, flavorful loaf that’s perfect for cozy evenings by the fire. Forget dry, bland quick breads – this recipe delivers a decadent experience with every bite. The creamy eggnog adds a unique sweetness and depth of flavor, beautifully complemented by the tender crumb and subtly spiced aroma. Whether you’re celebrating the holidays or simply craving a comforting treat, this Eggnog Bread is guaranteed to become a new family favorite. Imagine slicing into a warm, golden-brown loaf, the eggnog’s rich flavor dancing on your tongue, perfectly paired with a steaming mug of coffee or a glass of chilled milk. This recipe is your ticket to baking bliss, and we’re here to guide you through every step, ensuring a flawless and delicious result.
Why You’ll Love This Eggnog Bread Recipe
This Eggnog Bread recipe isn’t just another holiday bread; it’s a celebration of flavor and texture. There are several reasons why you’ll adore this recipe, and we’re confident it will quickly become a staple in your baking repertoire:
- Unbelievably Moist and Tender Crumb: The combination of softened butter, creamy eggnog, and the perfect balance of leavening agents results in a remarkably moist and tender crumb that melts in your mouth.
- Intense Eggnog Flavor: The generous amount of eggnog infused throughout the bread delivers a robust and unmistakable eggnog flavor that’s both festive and comforting. It’s the star of the show!
- Easy to Make: This recipe is surprisingly simple, even for beginner bakers. The straightforward instructions and readily available ingredients make it a breeze to prepare.
- Versatile: This Eggnog Bread is perfect for any occasion, not just the holidays. Serve it for breakfast, brunch, afternoon tea, or as a delightful dessert alongside your favorite beverage.
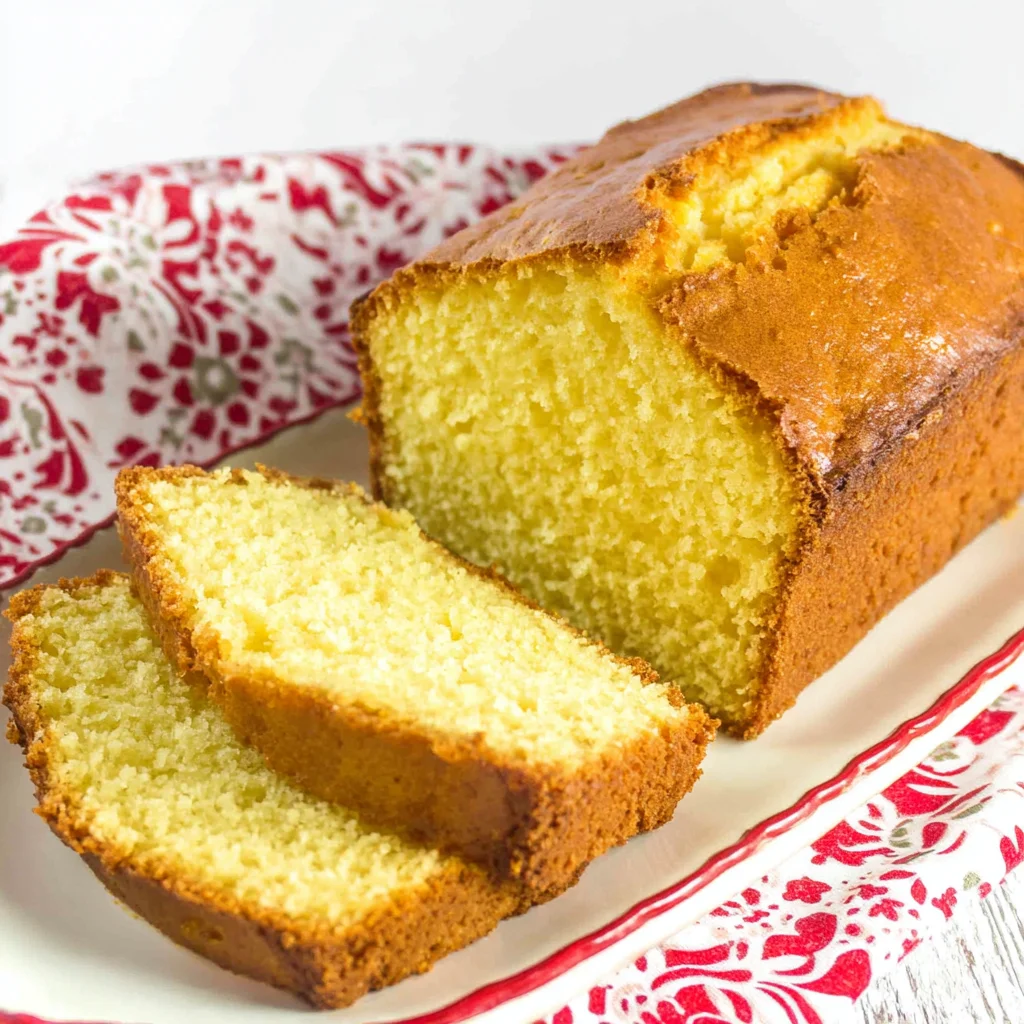
- Beautiful Presentation: The golden-brown loaf, especially when adorned with a simple eggnog glaze, makes a stunning centerpiece on your table, impressing guests and family alike. It’s almost too pretty to eat (almost!).
- Keeps Well: This bread stays fresh and moist for several days, making it ideal for baking ahead of time for parties or gatherings. You can even freeze it for later enjoyment.
This Eggnog Bread is more than just a recipe; it’s an experience. It’s the warm hug you need on a chilly day, the perfect treat for a festive gathering, and a delicious way to bring joy to your kitchen and your table. Ready to bake your own slice of happiness?
Why You Should Try This Eggnog Bread Recipe
In a world of countless baking recipes, this Eggnog Bread stands out for its unique blend of simplicity, flavor, and festive appeal. Here are some compelling reasons to give this recipe a try:
- Unique Flavor Profile: Eggnog bread isn’t something you find everywhere. This recipe offers a distinctive and memorable taste that sets it apart from ordinary quick breads. The eggnog adds a delightful richness and a touch of holiday magic.
- Perfect for Gift-Giving: Bake a loaf (or two!) to share with friends, family, neighbors, or colleagues during the holiday season. It’s a thoughtful and delicious gift that’s sure to be appreciated.
- Improves with Age (Slightly): While delicious fresh from the oven, this Eggnog Bread actually improves slightly in flavor over a day or two, allowing the eggnog notes to meld and deepen.
- Adaptable to Dietary Needs: With a few simple substitutions, you can easily adapt this recipe to suit various dietary restrictions, such as gluten-free or vegan diets (more details on this below!).
- Minimal Ingredients: You probably already have many of the ingredients in your pantry, making this a cost-effective and convenient baking project.
- A Guaranteed Success: This recipe is designed to be foolproof, leading to a perfectly moist and flavorful loaf every time. Even baking novices can confidently tackle this recipe.
Don’t miss out on the opportunity to create this delicious and festive Eggnog Bread. It’s a recipe that will impress your taste buds and delight your loved ones. Let’s get started!
Ingredients and Necessary Utensils for Eggnog Bread
Gathering the right ingredients and utensils is key to baking success. Here’s a detailed list to ensure you’re fully prepared before you begin your Eggnog Bread adventure:
Ingredients:
- 1 ½ cups (190g) all-purpose flour: The foundation of our bread, providing structure. Consider using cake flour for an even more tender crumb. Keywords: all-purpose flour, cake flour, gluten-free flour blend
- 1 teaspoon baking soda: A leavening agent, creating that delightful rise and airy texture. Keyword: Baking soda
- ½ teaspoon baking powder: Another crucial leavening agent, working in tandem with baking soda for optimal lift. Keyword: Baking powder
- ¼ teaspoon salt: Enhances the flavors and balances the sweetness. Don’t skip this important ingredient! Keyword: Salt
- ½ cup (113g) unsalted butter, softened: Adds richness, moisture, and a tender crumb. Make sure it’s softened to room temperature for easy creaming. Keywords: Unsalted butter, softened butter
- 1 ¾ cups (350g) granulated sugar: Provides sweetness and helps create a tender texture. You can adjust this amount based on your preference. Keywords: Granulated sugar, sugar
- 2 large eggs: Bind the ingredients together and add moisture. Ensure your eggs are at room temperature for optimal emulsification. Keywords: Eggs, large eggs
- 1 teaspoon vanilla extract: Adds warmth and enhances the overall flavor profile. Pure vanilla extract is preferred for its superior taste. Keywords: Vanilla extract, pure vanilla extract
- 1 cup (240ml) eggnog: The star of the show! Use your favorite brand or make your own homemade eggnog for an even more special touch. Keywords: Eggnog, homemade eggnog
- Optional Glaze Ingredients:
- 1 cup powdered sugar: Creates a sweet and delicate glaze. Keyword: Powdered sugar
- 2-4 tablespoons eggnog: Thins the powdered sugar to create a pourable glaze. Adjust the amount based on your desired consistency. Keyword: Eggnog
Utensils:
- 9×5 inch loaf pan: The perfect size for this recipe. Make sure it’s well-greased and floured or lined with parchment paper for easy release. Keywords: Loaf pan, 9×5 inch loaf pan
- Medium mixing bowl: For whisking together the dry ingredients. Keyword: Mixing bowl
- Large mixing bowl: For creaming the butter and sugar and combining the wet and dry ingredients. Keyword: Mixing bowl
- Whisk: To whisk the dry ingredients together smoothly. Keyword: Whisk
- Electric mixer (handheld or stand): Highly recommended for creaming the butter and sugar, but it can be done by hand with some effort. Keywords: Electric mixer, hand mixer, stand mixer
- Rubber spatula or wooden spoon: To scrape down the sides of the bowl and ensure all ingredients are thoroughly combined. Keywords: Rubber spatula, wooden spoon
- Wooden skewer or toothpick: To test for doneness. Keywords: Wooden skewer, toothpick
- Wire rack: To cool the bread completely. Keyword: Wire rack
- Measuring cups and spoons: For accurate measurements. Keywords: Measuring cups, measuring spoons
Having all your ingredients measured and your utensils ready will make the baking process much smoother and more enjoyable. Let’s move on to the detailed instructions!
Detailed Recipe Steps for Eggnog Bread
Follow these step-by-step instructions for a perfectly baked Eggnog Bread:
- Preheat & Prep: Preheat your oven to 350°F (175°C). This ensures even baking. Grease and flour a 9×5 inch loaf pan thoroughly. Lining the pan with parchment paper, leaving an overhang on the sides for easy removal, is highly recommended. Keyword: Preheat oven
- Dry Ingredients: In a medium bowl, whisk together the flour, baking soda, baking powder, and salt until fully combined. This prevents lumps and ensures even distribution of leavening agents. Make sure to sift the flour if you want an extra-fine crumb. Keyword: Dry ingredients
- Cream Butter & Sugar: In a large bowl, cream together the softened butter and sugar using an electric mixer (or a good amount of elbow grease by hand!) until the mixture is light, fluffy, and pale in color. This process incorporates air, resulting in a lighter and more tender bread. Creaming for at least 3-5 minutes is essential. Keyword: Cream butter and sugar
- Add Eggs & Vanilla: Beat in the eggs one at a time, mixing well after each addition. Then, stir in the vanilla extract. Ensure the eggs are at room temperature for optimal emulsification. Keyword: Add eggs and vanilla
- Combine Wet & Dry: Gradually add the dry ingredients to the wet ingredients, mixing on low speed with your electric mixer until just combined. Avoid overmixing, as this can develop the gluten in the flour and result in a tough bread. Mix until no more dry flour is visible. Keyword: Combine wet and dry ingredients
- Stir in Eggnog: Gently stir in the eggnog until the batter is smooth and evenly moistened. Do not overmix at this stage either. A few lumps are okay. Keyword: Stir in eggnog
- Bake: Pour the batter into the prepared loaf pan and bake for 50-60 minutes, or until a wooden skewer inserted into the center comes out clean. Start checking for doneness around the 50-minute mark to avoid overbaking. Every oven is different, so keep a close eye on it. Keyword: Bake eggnog bread
- Cool: Let the bread cool in the pan for 10 minutes before transferring it to a wire rack to cool completely. This allows the bread to set and prevents it from becoming soggy. Cooling completely is important before glazing or slicing. Keyword: Cool eggnog bread
- Optional Glaze: While the bread is cooling, whisk together the powdered sugar and eggnog until you reach your desired consistency. Drizzle the glaze over the cooled bread. For a thicker glaze, use less eggnog; for a thinner glaze, use more. Keyword: Eggnog glaze
Following these steps carefully will help you create a perfect Eggnog Bread that’s both delicious and visually appealing. Remember to be patient, and enjoy the process!
Tips and Variations for Eggnog Bread
Here are some tips and variations to enhance your Eggnog Bread baking experience:
- Ingredient Alternatives:
- Flour: Substitute all-purpose flour with gluten-free all-purpose flour blend for a gluten-free version. You might need to add a tablespoon or two of xanthan gum for better binding.
- Butter: Use vegan butter or coconut oil as a substitute for a vegan version. Coconut oil will add a subtle coconut flavor.
- Eggnog: Experiment with different types of eggnog, such as spiced eggnog or light eggnog. You could even try using rum-flavored eggnog for an adult twist.
- Sweetener: If you prefer a less sweet bread, reduce the sugar by ¼ cup.
- Avoiding Common Mistakes:
- Overmixing: Overmixing the batter develops the gluten, resulting in a tough bread. Mix until just combined.
- Underbaking: Ensure the bread is baked thoroughly. A toothpick inserted into the center should come out clean.
- Overbaking: Overbaking dries out the bread. Start checking for doneness a few minutes before the minimum baking time.
- Cold Ingredients: Use room temperature ingredients, especially the butter and eggs, for optimal emulsification.
- Adding Flavor Variations:
- Spices: Add a pinch of nutmeg, cinnamon, or cloves for extra warmth and spice.
- Nuts: Incorporate chopped pecans, walnuts, or macadamia nuts into the batter for added texture and flavor.
- Chocolate Chips: Fold in semi-sweet or milk chocolate chips for a delicious chocolate eggnog bread twist.
- Dried Fruits: Add chopped dried cranberries or raisins for a festive touch.
Nutritional Values and Benefits of Eggnog Bread
While Eggnog Bread is undeniably indulgent, it also offers some nutritional benefits thanks to its ingredients. Please note that precise nutritional values will vary depending on the specific ingredients used. This is an approximation based on the recipe above:
Approximate Nutritional Information per slice (assuming 12 slices):
- Calories: Approximately 300-350
- Protein: Approximately 4-5g
- Fat: Approximately 15-18g
- Carbohydrates: Approximately 40-45g
Benefits of Ingredients:
- Whole wheat flour (optional): Substituting some all-purpose flour with whole wheat flour will boost the fiber content, aiding in digestion and promoting satiety.
- Eggs: Excellent source of protein, essential for building and repairing tissues.
- Butter: Provides essential fatty acids, although moderation is key.
- Eggnog: Depending on the recipe, eggnog can contribute calcium and vitamins from the milk and eggs used in its preparation.
Remember that this is a treat and should be enjoyed in moderation as part of a balanced diet. The nutritional values provided are estimates and may vary.
FAQs
Can I make Eggnog Bread ahead of time?
What happens if I overmix my Eggnog Bread batter?
Can I use homemade eggnog in this Eggnog Bread recipe?
Is this Eggnog Bread recipe gluten-free adaptable?
How do I store leftover Eggnog Bread?
Conclusion
This Eggnog Bread recipe is more than just a recipe; it’s a journey to a comforting, flavorful, and festive experience. From the simple yet effective steps to the delightful eggnog-infused flavor, this bread is guaranteed to become a staple in your baking repertoire. Remember to follow the tips and variations to customize the bread to your liking and dietary needs. We encourage you to share your baking adventures with us in the comments section below! Let us know how your Eggnog Bread turned out, and don’t forget to share this recipe with your friends and family. Happy baking! For more delicious holiday treats, check out our other recipes like these creamy pumpkin ravioli or our Christmas thumbprint cookies.
And if you’re looking for more amazing baking inspiration, be sure to check out our Pinterest page for even more delicious recipes! Pinterest
Moist and Delicious Eggnog Bread
Ingredients
Equipment
Method
- Preheat oven to 350°F (175°C). Grease and flour a 9x5 inch loaf pan.
- In a medium bowl, whisk together flour, baking soda, baking powder, and salt.
- In a large bowl, cream together softened butter and sugar until light and fluffy. Use an electric mixer for best results.
- Beat in eggs one at a time, then stir in vanilla extract.
- Gradually add dry ingredients to wet ingredients, mixing on low speed until just combined. Do not overmix.
- Gently stir in eggnog until batter is smooth.
- Pour batter into prepared loaf pan and bake for 50-60 minutes, or until a wooden skewer inserted into the center comes out clean.
- Let bread cool in the pan for 10 minutes before transferring to a wire rack to cool completely. Make glaze (optional) by whisking together powdered sugar and eggnog to desired consistency. Drizzle over cooled bread.


