There is nothing quite like the burst of color and pure, unadulterated joy packed into a perfect Funfetti Cookie. These aren’t just cookies; they are edible celebrations, bringing the nostalgic taste of birthday cake batter directly to your mouth, wrapped in a perfectly chewy, buttery shell. If you’ve ever tried those dry, crumbly cookies made from a box mix and wished for something more sophisticated, chewy, and rich this recipe is your answer.
Our classic recipe for homemade Funfetti Cookies elevates the classic cake mix flavor by using quality baking ingredients and specific techniques to achieve that sought-after texture: slightly crisp edges, a plush, gooey center, and a beautiful suspension of vibrant rainbow sprinkles. We’ve cracked the code on how to ensure those precious sprinkles don’t bleed their color, leaving you with picture-perfect treats every single time. Get ready to bake a batch of happiness that will disappear faster than you can say, “Happy Birthday!” Whether you are celebrating a major milestone, need a pick-me-up, or simply crave the delightful taste of cake in cookie form, these Funfetti Cookies are guaranteed to become a beloved staple in your kitchen. Just like our Gooey Butter Cookies, they offer an incredible depth of flavor and texture that mass-produced treats simply cannot match.
Why You’ll Fall Head Over Heels for These Funfetti Cookies
While the market is flooded with recipes for sprinkle-laden treats, this specific approach to making Funfetti Cookies stands out for several compelling reasons. We don’t rely on cake mix here; we build the flavor profile from scratch, giving us superior control over moisture, sweetness, and that unmistakable buttery richness.
Achieving the Perfect Texture: Chewy, Soft, and Puffy
The single most important factor in a perfect cookie is texture, and these Funfetti Cookies deliver perfection. They achieve that ideal balance of structural integrity and tender softness, thanks to the precise ratio of brown sugar to granulated sugar, and the strategic addition of milk. The slight acidity and moisture in the brown sugar ensure a wonderfully chewy texture that resists drying out, while the process of creaming the butter and sugar for a full 3 to 4 minutes incorporates air, leading to a puffy center rather than a dense, flat disk.
- The Crinkle Factor: The golden-brown edges provide just enough crunch to contrast the soft middle.
- Cake Batter Flavor: By utilizing vanilla extract (and many bakers recommend using a clear vanilla for the authentic cake flavor aesthetic), we mimic the rich, nostalgic notes of classic Funfetti cake.
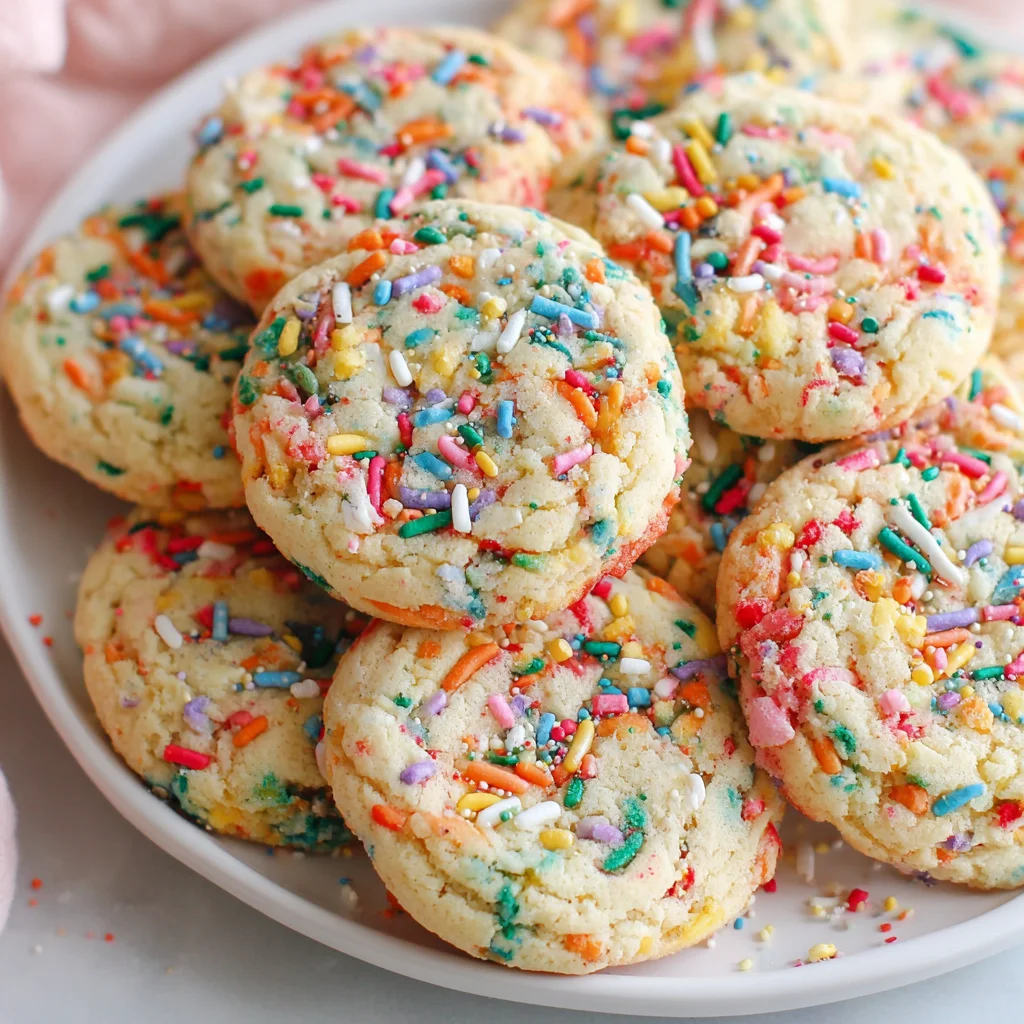
- No Color Bleeding: We specifically call for high-quality jimmie sprinkles. Nonpareils (the tiny round ones) contain starches and dyes that bleed immediately upon contact with moisture in the dough, resulting in murky, gray-ish cookies. Jimmies, conversely, hold their shape and vibrant colors perfectly, ensuring every cookie looks as good as it tastes.
The Unmatched Joy of Celebration Baking
Baking should be fun, and incorporating rainbow sprinkles into the dough is inherently joyful. These cookies are instant mood boosters. They are incredibly versatile and perfect for:
- Birthday parties (as an alternative to cake or alongside it).
- Holiday platters (adjusting the sprinkle color to match the season, e.g., red and green for Christmas).
- Lunchbox surprises or after-school snacks.
- Simply cheering up a dreary Tuesday.
They freeze beautifully, meaning you can have a batch of these celebratory homemade treats ready for any unexpected gathering or craving. This recipe is straightforward enough for beginner bakers but utilizes advanced techniques (like the precise creaming and chilling steps) that will impress even seasoned cooks looking for the very best version of a sprinkle cookie.
The Magic Behind the Sprinkles: Why You Must Try This Celebration Cookie Recipe Today
You might already have a chocolate chip cookie recipe in your repertoire, but adding the category of Funfetti Cookies brings a special kind of magic that traditional cookies just can’t replicate. This recipe delivers reliable, consistent results every time, minimizing the frustration often associated with baking soft, puffy cookies.
Mastering Moisture Control
One common pitfall in cookie baking is dough that is too dry or too wet. Our formulation achieves the perfect balance by incorporating a small but crucial amount of whole milk. The milk adds necessary moisture without making the dough sticky, and also contributes to the desired “cake-like” chew. Furthermore, using room-temperature ingredients is key here. When butter, eggs, and milk are at the same temperature, they emulsify better during the mixing process, leading to a more homogenous, tender crumb.
This recipe is designed to be highly reproducible. We use standard measurements (both cup and metric grams) to ensure accuracy, which is essential when baking. For example, the ratio of flour to fat and liquid is carefully calibrated to prevent excessive spreading, ensuring you get those nice, thick bakery-style cookies.
A Note on Flavor Depth: Beyond Just Sugar
While most sprinkle cookies taste primarily of sugar, our recipe focuses on building layers of flavor. We use a combination of light brown sugar and granulated sugar. Granulated sugar provides the crispness, while light brown sugar, which contains molasses, contributes depth, chewiness, and that slight butterscotch note that pairs so wonderfully with rich vanilla and dairy. The 1 Tablespoon of high-quality vanilla extract isn’t just an afterthought it’s the cornerstone of the “cake batter” flavor we are striving for.
Trying this recipe isn’t just about baking a dessert; it’s about mastering the art of the perfect drop cookie. By following the detailed instructions regarding creaming time and the gentle mixing of dry ingredients, you will gain confidence in your baking skills, producing a product far superior to anything you’d buy pre-packaged. If you enjoyed the straightforward yet flavorful approach of our Fudgy Chocolate Brownie Cookies, you will appreciate the simplicity and robust results of these delightful Funfetti Cookies.
Essential Ingredients and Tools for Perfect Funfetti Cookies
Success in baking begins long before the oven is preheated. It starts with precise measurements and understanding the role each ingredient plays. Below is a detailed breakdown of what you need to make the best celebration cookies possible.
Ingredients Breakdown and the Science of Baking
Every item on this list has a job. Pay close attention to temperature and quality for optimal results.
- 2 ¼ cups (270g) All-Purpose Flour: The structure of the cookie. Ensure you measure correctly by spooning the flour into the measuring cup and leveling it off. Scooping directly can compact the flour, resulting in a dense, dry cookie.
- 1 teaspoon Baking Soda: The primary leavening agent. It reacts with the slight acidity in the brown sugar (molasses) to give the cookies their necessary lift and puffy centers.
- ½ teaspoon Salt: Crucial for balancing the sweetness and enhancing the rich vanilla and butter flavors.
- 1 cup (2 sticks or 227g) Unsalted Butter: Must be softened to true room temperature. Too cold, and it won’t cream properly, leading to dense cookies. Too warm (melty), and the dough will be greasy and spread too much.
- ¾ cup (150g) Granulated Sugar: Contributes to crispness on the edges and helps aerate the butter during the creaming process.
- ¾ cup (165g) Packed Light Brown Sugar: The secret to chewiness. The molasses content adds moisture and flavor depth. Ensure it is packed firmly into the measuring cup.
- 2 large Eggs: Must be at room temperature! Room temperature eggs incorporate smoothly into the butter-sugar mixture, creating a stable, high-volume emulsion that contributes to the cookie’s final texture and lift.
- 1 Tablespoon Vanilla Extract: Use high-quality extract. If you are aiming for the bright white/pale yellow dough of classic cake mix, use clear vanilla flavor; otherwise, standard pure vanilla extract provides superior flavor.
- 3 Tablespoons Milk (whole milk recommended): This small amount of liquid adds necessary moisture to mimic the cake batter texture without watering down the dough. Whole milk provides the richest flavor.
- ½ cup (100g) Rainbow Jimmie Sprinkles: This is non-negotiable for success! Use jimmie-style sprinkles (the cylindrical rods), not nonpareils (tiny spheres). Jimmies are coated and hold up better against the moisture in the dough, preventing the colors from bleeding and turning your dough gray.
When measuring ingredients, especially for baking, using a kitchen scale for the flour, butter, and sugars (if specified in grams) is the gold standard for repeatable results. This eliminates inconsistencies caused by different measuring techniques.
Necessary Equipment for Baking Success
While this is a relatively simple recipe, the right tools make the process smoother, cleaner, and guarantee better results.
- Stand Mixer or High-Powered Hand Mixer: Essential for the creaming process (Step 2). Trying to cream the butter and sugar manually for the required 3–4 minutes is nearly impossible and will compromise the cookie texture. Use the paddle attachment on a stand mixer.
- Rubber Spatula: Necessary for scraping the sides of the bowl (ensuring even mixing) and for the gentle folding of the sprinkles at the end.
- Medium Bowl: For combining the dry ingredients.
- Parchment Paper or Silicone Baking Mats: Absolute must-haves. They prevent sticking and contribute to even heat distribution, helping the cookie bottoms brown perfectly without burning.
- Medium Cookie Scoop (1.5–2 Tbsp): Using a scoop ensures every cookie is the same size. Uniformity is key for even baking, preventing some cookies from burning while others remain raw.
- Wire Cooling Rack: Allowing the cookies to cool completely on a wire rack prevents condensation and soggy bottoms.
Step-by-Step Guide: Baking the Best Funfetti Cookies
Follow these detailed steps closely, paying special attention to timing and temperature, to achieve bakery-quality Funfetti Cookies.
Step 1: Prepare and Combine Dry Ingredients
- Preheat your oven to 350°F (175°C). Proper preheating is essential for cookies to set quickly when they hit the heat. Line two large baking sheets with parchment paper or silicone baking mats.
- In a medium bowl, whisk together the all-purpose flour, baking soda, and salt. Whisking dry ingredients ensures the leavening agent (baking soda) is evenly distributed throughout the flour. Set this mixture aside.
Step 2: Cream Butter and Sugars – The Foundation of Texture
- In the bowl of a stand mixer fitted with the paddle attachment (or use a large mixing bowl with a hand mixer), beat the softened butter, granulated sugar, and light brown sugar together on medium speed.
- This is the longest mixing phase and the most critical: Continue beating until the mixture is light, fluffy, and noticeably paler in color. This process is called aeration and should take approximately 3 to 4 minutes. You are literally whipping air into the fat, which provides structure and lift. Stop and scrape down the sides of the bowl often, ensuring all butter and sugar are uniformly incorporated.
Step 3: Add Wet Ingredients – Building the Emulsion
- Add the eggs one at a time. Beat well after each addition until the yolk is fully incorporated into the creamed mixture. Adding them individually prevents the mixture from breaking.
- Add the vanilla extract and the milk. Beat on low speed until just combined. The key here is minimal mixing. We want to avoid incorporating too much air or developing gluten at this late stage.
Step 4: Combine Wet and Dry Mixtures – The Gluten Rule
- Gradually add the reserved dry ingredient mixture to the wet ingredients. Start on the lowest speed possible.
- Mix until the dough is just combined and no streaks of flour remain. Pause frequently to scrape down the sides. Do not overmix the dough! Once flour interacts with liquid, gluten begins to develop. Overmixing leads to excessive gluten, which results in tough, dense cookies. The moment the last streaks of flour disappear, stop the mixer.
Step 5: Incorporate the Sprinkles – Keep it Gentle
- Gently fold the rainbow jimmie sprinkles into the cookie dough using a rubber spatula. Use a folding motion rather than stirring violently, which could activate remaining gluten.
- Mix only until the sprinkles are evenly distributed throughout the dough. Avoid excess movement to protect the integrity of the sprinkles and prevent color bleed. If you want truly beautiful, vibrant cookies, try adding an extra small handful of sprinkles to the exterior of the dough balls right before baking!
Step 6: Chill the Dough (Highly Recommended)
- For thicker, chewier cookies that spread less, cover the bowl and chill the dough in the refrigerator for 30 minutes. Chilling solidifies the butter, ensuring the cookies hold their shape longer in the oven.
- If you are in a rush, you may skip this step, but be prepared for the cookies to spread more thinly.
Step 7: Scoop and Bake – Even Results Guaranteed
- Use a medium cookie scoop (about 1.5 to 2 tablespoons) to portion the dough. Roll the portions into uniform balls this helps them bake into a nice rounded shape.
- Place the dough balls 2 inches apart on the prepared baking sheets.
- Bake for 9 to 12 minutes, or until the edges are lightly golden brown and the centers are still slightly soft and puffy. It is crucial to underbake slightly. The residual heat from the baking sheet will finish cooking the centers once they are removed from the oven, resulting in that gooey, soft texture. Do not overbake, or they will turn dry and crunchy.
Step 8: Cool and Enjoy
- Remove the sheets from the oven and let the cookies cool on the baking sheet for 5 minutes. The cookies will continue to set and firm up during this time.
- Transfer the cookies to a wire rack to cool completely before serving or storing. Store cooled Funfetti Cookies in an airtight container at room temperature for up to 5 days. For long-term storage, the baked cookies freeze exceptionally well!
Tips, Troubleshooting, and Delicious Variations for Your Funfetti Cookies
Even the simplest recipes can present challenges. Here are tips to ensure flawless baking, common troubleshooting advice, and creative ways to customize your Funfetti Cookies.
Troubleshooting Common Cookie Issues
Problem: The cookies spread too much.
- Solution 1: Check Butter Temperature. If your butter was too soft or slightly melted, the cookies will spread immediately. Ensure it is only softened, not greasy.
- Solution 2: Use the Chill Step. Chilling the dough for at least 30 minutes is the best defense against spreading.
- Solution 3: Check Flour Measurement. Did you scoop the flour directly from the bag? This adds too much flour. Measure by weight or use the spoon-and-level method.
Problem: The sprinkles bled their color.
This happens if you used nonpareil sprinkles (the tiny spheres). Nonpareils have a higher starch content and thinner coating, making them bleed easily when exposed to the fat and moisture in the dough. Always use jimmie sprinkles for superior color retention.
Tip for Puffy Centers (The Bakery Trick):
If your cookies seem too flat halfway through baking (around the 6-minute mark), take the baking sheet out and gently tap it sharply on the counter 2-3 times. This causes the air inside to deflate slightly, pushing the edges inward, creating beautiful wrinkles and thicker centers. Return them to the oven immediately to finish baking.
Delicious Variations on the Classic Funfetti Cookies
While the classic recipe is divine, you can easily adapt these celebration cookies to fit different flavor preferences or dietary needs.
- White Chocolate Chip Funfetti: Fold in ½ cup of good quality white chocolate chips alongside the sprinkles for extra richness. White chocolate complements the vanilla-cake flavor beautifully.
- Gluten-Free Funfetti: Substitute the all-purpose flour with a 1:1 gluten-free baking blend (like Bob’s Red Mill or King Arthur). You may need to chill the dough slightly longer (45 minutes) as GF flours tend to absorb moisture differently.
- Birthday Cake Funfetti: Enhance the “cake batter” essence by adding ½ teaspoon of almond extract along with the vanilla. For an extra festive presentation, top the cooled cookies with a simple vanilla glaze or creamy cream cheese frosting.
- Seasonal Sprinkles: Use red and pink jimmies for Valentine’s Day, pastels for Easter, orange and black for Halloween, or red and green for a beautiful batch of Christmas cookies just like the festive hues in our Maple Cookies.
Nutritional Insights: Enjoying Your Homemade Celebration Cookies
When indulging in homemade treats like these delicious Funfetti Cookies, it’s important to recognize that baking from scratch gives you full control over the quality of the ingredients used. Unlike many store-bought alternatives that rely on artificial ingredients and preservatives, these cookies utilize simple, whole ingredients: real butter, eggs, flour, and sugar.
The Benefits of Baking from Scratch
While these are decidedly a celebratory treat, designed for deliciousness rather than low-calorie dieting, there are inherent benefits to homemade baking:
- Ingredient Transparency: You know exactly what is going into your body, avoiding hydrogenated oils, high fructose corn syrup, and unnecessary additives often found in commercial sprinkle cookies.
- Source of Energy: Cookies, like most baked goods, are primarily composed of carbohydrates (from sugar and flour) and healthy fats (from butter and eggs). This combination provides quick energy, making them excellent morale boosters or satisfying post-workout snacks (in moderation).
- Dairy and Egg Richness: The use of real butter and whole milk provides beneficial dietary fats and vitamins (like Vitamin A and D), while eggs contribute high-quality protein and essential micronutrients.
General Nutritional Estimates (Per 2-Tablespoon Cookie, Unfrosted):
Please note that exact values can vary based on brand ingredients and actual cookie size. These are generalized estimates based on the provided ingredients for a standard 2-tablespoon portion size:
| Nutrient Category | Approximate Value |
|---|---|
| Calories | 120–150 kcal |
| Total Fat | 6–8 grams |
| Saturated Fat | 4–5 grams |
| Carbohydrates | 15–20 grams |
| Sugar | 10–12 grams |
| Protein | 1–2 grams |
Enjoying these Funfetti Cookies is about balancing indulgence with awareness. When portioned correctly (using the medium scoop as specified), they fit perfectly into a balanced diet as an occasional, deeply satisfying dessert. Remember that the joy and psychological comfort derived from eating a beloved homemade treat often outweigh the strict caloric counts. They truly embody celebration!
Funfetti Cookie FAQs
We’ve gathered the most common questions related to baking perfect Funfetti Cookies to help ensure your batch is a guaranteed success.
Q: Why are my homemade Funfetti Cookies spreading flat?
A: Spreading is often caused by warm butter or insufficient flour. Ensure your butter is only softened, not melted, and always chill the dough for at least 30 minutes before baking. Also, make sure you are measuring flour precisely; too little flour prevents the structure from holding.
Q: Can I use nonpareil sprinkles (the little balls) instead of jimmies in my Funfetti Cookies?
A: It is strongly advised against using nonpareils. Nonpareils tend to bleed their color instantly when mixed into the dough, resulting in dull, gray-ish cookies. Jimmie sprinkles are coated and hold their color integrity better, guaranteeing vibrant rainbow colors in your final product.
Q: How do I get that classic “cake batter” flavor in my Funfetti Cookies?
A: The cake batter flavor comes primarily from using high-quality vanilla extract (we recommend 1 tablespoon). For an even more authentic taste, some bakers add a touch of clear vanilla extract or a small amount (1/4 tsp) of almond extract to boost that specific nostalgic flavor profile.
Q: How should I store leftover Funfetti Cookies to keep them fresh?
A: Once completely cooled, store the cookies in an airtight container at room temperature. They will remain fresh and chewy for up to 5 days. For longer storage, the baked cookies can be frozen for up to three months; simply thaw them on the counter before serving.
Q: Is it okay to skip the step where I beat the butter and sugar for 3 to 4 minutes?
A: No, this step is essential! Creaming for the full duration incorporates necessary air (aeration) into the mixture. This air is what gives the Funfetti Cookies their puffy, light, and chewy texture, preventing them from becoming dense or flat.
Conclusion: Bake Your Way to Happiness with Funfetti Cookies
These Classic Funfetti Celebration Cookies are more than just a dessert; they are a delightful centerpiece for any moment that calls for a dash of color and a whole lot of cheer. By following our detailed instructions paying close attention to the creaming process, using room-temperature ingredients, and selecting the right jimmie sprinkles you will consistently achieve cookies that boast that irresistible chewy center and rich, authentic cake batter flavor.
We’ve equipped you with the knowledge to troubleshoot common issues and even adapt the recipe, whether you’re looking for a gluten-free variation or want to introduce complementary flavors like white chocolate. The satisfaction of pulling a sheet of perfectly round, brightly colored Funfetti Cookies from the oven is unmatched.
Don’t hesitate to bookmark this recipe, as it is sure to become your gold standard for sprinkle cookies. Whether you’re baking for a special event or simply treating yourself, these cookies promise to deliver happiness in every bite. We encourage you to try this recipe, share your baking success, and let us know in the comments how your celebration cookies turned out!
Classic Funfetti Celebration Cookies
Ingredients
Equipment
Method
- Preheat your oven to 350°F (175°C). Line two large baking sheets with parchment paper or silicone baking mats.
- In a medium bowl, whisk together the all-purpose flour, baking soda, and salt. Set the bowl aside.
- In the bowl of a stand mixer fitted with the paddle attachment (or use a large mixing bowl with a hand mixer), beat the softened butter, granulated sugar, and light brown sugar together on medium speed.
- Continue beating until the mixture is light, fluffy, and noticeably paler in color, which should take approximately 3 to 4 minutes. Stop and scrape down the sides of the bowl as needed.
- Add the eggs one at a time, beating well after each addition until the yolk is fully incorporated into the mixture. Add the vanilla extract and the milk. Beat on low speed until just combined. Be careful not to overmix at this stage.
- Gradually add the reserved dry ingredient mixture to the wet ingredients. Mix on low speed, pausing often to scrape down the sides, until the dough is just combined and no streaks of flour remain. Do not overmix the dough.
- Gently fold the rainbow jimmie sprinkles into the cookie dough using a rubber spatula. Mix only until the sprinkles are evenly distributed throughout the dough.
- For thicker cookies that spread less, cover the bowl and chill the dough in the refrigerator for 30 minutes. If you are in a rush, you may skip this step.
- Use a medium cookie scoop (about 1.5 to 2 tablespoons) to portion the dough. Roll the portions into uniform balls and place them 2 inches apart on the prepared baking sheets.
- Bake for 9 to 12 minutes, or until the edges are lightly golden brown and the centers are still slightly soft and puffy. Do not overbake.
- Remove the sheets from the oven and let the cookies cool on the baking sheet for 5 minutes. The cookies will continue to set during this time. Transfer the cookies to a wire rack to cool completely before serving or storing.


